The elevator is completely riveted, except for the trailing edge, forward spar and hinges. This will be done once the inspection is complete, which will hopefully be scheduled in the next week.
Next is the trim tab. Honestly, I stared at this for quite awhile trying to figure out the best way to approach it. Turned out to be very easy and straight forward.
Some of the ribs had to be straightened as they were slightly deformed.
The control horn needed to be fabricated out of some aluminum T stock. I sure wish I had a bandsaw for this - I used a die grinder with a cutoff wheel.
Center lines were drawn on each rib. I focused on the left hand edge rib first to position it correctly inside the skins (the manual is not much help here). Once it had that one positioned correctly, I marked the top rivet location on each rib and clamped it in place. Once one hole was drilled, I then clecoed it and lined up the center line on the rib and drilled the remaining holes.
Once I had a gameplan it went together very fast.
Everything stripped down, alodined and zinc/chromated.
Riveting this worried the hell out of me. I know from experience that when you F*** up a skin, it takes a very long time to fix, and it never looks right. You are better off to wait. And it all comes down to the jig you build to hold it in place. even more so with the trim tab as it has so little structure - especially the top skin.
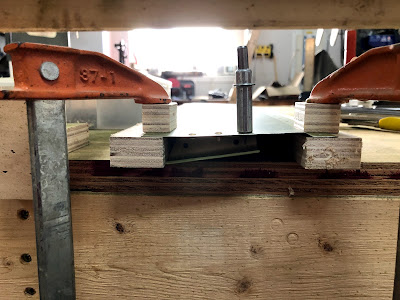
So I finally went with the below jig. 2 long pieces of 3/4" ply (~1" wide") on the bench for the flanges to rest on. A small wood block on top, and clamped the whole thing to the table. I fed the trim tab forward as I riveted each rib. Rivet gun on top, bucking bar on the bottom.
Worked well. Didnt screw up any of the solid rivets. The top is all solid rivets except the ribs where the control horn goes. The bottom is ONLY solid rivets for the control horn and corresponding ribs. Everything else will be 1/8" blind rivets.
Now it is onto the hinges.


