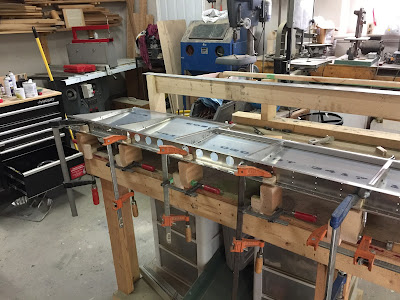
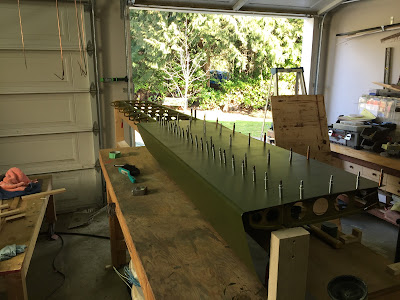
The elevator is completely riveted, except for the trailing edge, forward spar and hinges. This will be done once the inspection is complete, which will hopefully be scheduled in the next week.
Next is the trim tab. Honestly, I stared at this for quite awhile trying to figure out the best way to approach it. Turned out to be very easy and straight forward.
Some of the ribs had to be straightened as they were slightly deformed.
The control horn needed to be fabricated out of some aluminum T stock. I sure wish I had a bandsaw for this - I used a die grinder with a cutoff wheel.
Center lines were drawn on each rib. I focused on the left hand edge rib first to position it correctly inside the skins (the manual is not much help here). Once it had that one positioned correctly, I marked the top rivet location on each rib and clamped it in place. Once one hole was drilled, I then clecoed it and lined up the center line on the rib and drilled the remaining holes.
Once I had a gameplan it went together very fast.
Everything stripped down, alodined and zinc/chromated.
Riveting this worried the hell out of me. I know from experience that when you F*** up a skin, it takes a very long time to fix, and it never looks right. You are better off to wait. And it all comes down to the jig you build to hold it in place. even more so with the trim tab as it has so little structure - especially the top skin.
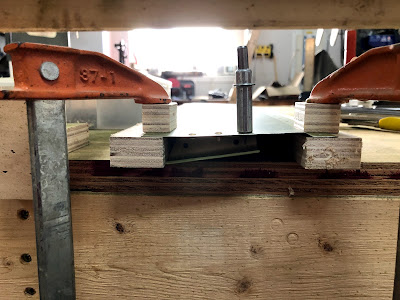
So I finally went with the below jig. 2 long pieces of 3/4" ply (~1" wide") on the bench for the flanges to rest on. A small wood block on top, and clamped the whole thing to the table. I fed the trim tab forward as I riveted each rib. Rivet gun on top, bucking bar on the bottom.
Worked well. Didnt screw up any of the solid rivets. The top is all solid rivets except the ribs where the control horn goes. The bottom is ONLY solid rivets for the control horn and corresponding ribs. Everything else will be 1/8" blind rivets.
Now it is onto the hinges.
Search This Blog
Tuesday 7 November 2017
Friday 25 August 2017
Elevator - Part III
- Bottom skins cleecoed
- Control horns cleecoed
- First trailing edge skin epoxied
 |
| Bottom skins are finally on! And they won't be coming off... |
 |
| Center section - including control horns - ready for riveting. Waiting for an offset / bent 1/8" snap to show up from Aircraft Spruce. |
 |
| See - there really are two skins! |
 |
| Trailing edge epoxied and clamped with aluminum L brackets and cleecos |
 |
| Another view of the same - trailing edge clamped. |
- Exoxy left hand trailing edge
- Rivet control horn
- Pull rivets on aft skin holes, hard rivets on fore holes
- Then onto the trim tab!
Wednesday 12 July 2017
Elevator - Part II
It's been a month since the last post, and the elevator is moving along well, and it will hopefully be completed (ready for inspection status) in the next week or so. Summer is busy with family stuff, but I have still managed to make progress.
So I **THINK** my method for raising the elevator to leave the clecos in place worked.
I cut up some sections of 2x4 and clamped them to the front of the bench, then put additional blocks along the ribs and rear spar to lift the whole thing up. Used the level method, same as the Horizontal Stabilizer to check for level along the entire structure. It should be perfectly flat.
Control horn placement, ready for drilling.
Getting ready for the top skins. You can see my method to raise up the elevator to leave the top skins and clecos in place for drilling the other side.
Cutting the hole for the trim servo. NOTE: This is done per the manual, but the slot does not line up with the wiring harness coming out of the servo assembly. But, you an line it up, drop it in, and then slide it into place.
Disassembly and alodining, ready for primer.
Primed. I ws tired of hanging the parts and having to hold them while priming. The ribs are so light that they fly around under the spray, so I figured I would try a board. This is all parts of the wing crate chopped up. Worked OK - much better than hanging them from a wire, but still not ideal.
Riveting the doublers in place. A friend loaned me his pneumatic rivet squeezer. Wow... I squeezed all 88 rivets in less than 1 hour. I can't say enough about properly clamping all the parts in place prior to riveting. Sure makes a nice job.
End doubler on the main spar, all done. Turned out quite nice.
Rib A / B, with doublers in place.
Center section ribs riveted to the aft partial spar.
What's next:
- Rivet top skins
- Place counterweight ribs and rivet
- Flip over, rivet control horns in place, rivet bottom skins
At that point, the elevator will be put aside awaiting inspection before riveting skins to spar, and spar to ribs. Will get the trim tab assembled, but I anticipate that will be quick. Will be submitting the inspection paperwork in the next couple days.
So I **THINK** my method for raising the elevator to leave the clecos in place worked.
I cut up some sections of 2x4 and clamped them to the front of the bench, then put additional blocks along the ribs and rear spar to lift the whole thing up. Used the level method, same as the Horizontal Stabilizer to check for level along the entire structure. It should be perfectly flat.
Elevator control horns...
Control horn placement, ready for drilling.
Getting ready for the top skins. You can see my method to raise up the elevator to leave the top skins and clecos in place for drilling the other side.
Cutting the hole for the trim servo. NOTE: This is done per the manual, but the slot does not line up with the wiring harness coming out of the servo assembly. But, you an line it up, drop it in, and then slide it into place.
Disassembly and alodining, ready for primer.
Primed. I ws tired of hanging the parts and having to hold them while priming. The ribs are so light that they fly around under the spray, so I figured I would try a board. This is all parts of the wing crate chopped up. Worked OK - much better than hanging them from a wire, but still not ideal.
Riveting the doublers in place. A friend loaned me his pneumatic rivet squeezer. Wow... I squeezed all 88 rivets in less than 1 hour. I can't say enough about properly clamping all the parts in place prior to riveting. Sure makes a nice job.
End doubler on the main spar, all done. Turned out quite nice.
Rib A / B, with doublers in place.
Center section ribs riveted to the aft partial spar.
Top skins clecoed to the structure, ready to rivet.
What's next:
- Rivet top skins
- Place counterweight ribs and rivet
- Flip over, rivet control horns in place, rivet bottom skins
At that point, the elevator will be put aside awaiting inspection before riveting skins to spar, and spar to ribs. Will get the trim tab assembled, but I anticipate that will be quick. Will be submitting the inspection paperwork in the next couple days.
Tuesday 13 June 2017
Onto the Elevator...
It has been too long since building. Lots of other projects, work, and trips getting in the way.
The wing kit is all safely tucked away in the basement - and getting that crate apart turned into a multi day effort - WOW.
The below pic is the elevator forward spar with the doublers clamped in place.
Pilot holes drilled for the doublers.
All doublers drilled.
All ribs, and partial ribs clecoed in place.
Center rib (A and B) doublers ready for drilling.
The centre section needs to be squared up before drilling the partial aft spar (where the trim tab goes).
Bottom right skin clamped in place ready for drilling.
Control horns drilled. Still need to trim off the excess on the aluminum angle.
Bottom right skin drilled. The clamping method I devised is working fine for the elevator, but will NOT work when I flip it over to drill the top skins. I am going to try something similar, but with 2" blocks instead of 0.75".
Trim tab pushrod slot cut in left hand skin. Once the pilot and main holes were drilled, I put 2 pieces of 3/4" plywood under each side of the slot and then clamped it to the work bench. This gave me a relatively steady skin for dremmeling and filing.
Left hand skin in place, ready to drill.
Left hand skin drilled!
Left hand skin has a corresponding slot cut in it (using right hand skin slot as template). Also, control horn attach angles are drilled into the spar, ribs and doublers.
Thursday 20 April 2017
Horizontal Stabilizer Ready for Inspection, and Wing Kit Arrival!
Been awhile since I have posted... we took a nice holiday in California for 2 weeks in March, so progress has been slow. BUT...
Horizontal stab is completely riveted on one side, and ready for MD-RA inspection. It is safely put away until that milestone is ready.
Also, I have been working on the annual for the Emeraude - which is taking a fair bit of time.
The big news is the wing kit arrived today!
So here are some notes / hints for wing kit shipping / delivery - this is specific to Canada / transborder, but has some general notes as well:
- If you plan on picking the crate up from Glasair directly, you will get charged local (WA State) sales tax @ 9.1%.
- Glasair will arrange for shipping, which means dock to dock. They will not setup delivery to your door / on the ground. Unfortunately I was not informed of any of this until the kit was ready to go.
- Glasair / their shipper will arrange brokerage, but it is at a premium. In my case, shipping was $600 USD, but shipping and brokerage was $1600. I arranged brokerage for $275 Canadian (About $210 USD)
- After asking on the Glasair forum how guys have dealt with shipping in the past, they have had the crate sent to a shipping location that has a loading dock. They then arranged for another shipper with either a flat deck or hiab crane to deliver the crate to its destination and drop it. In my case, I had a flat deck deliver the crate and we just slid it off onto Harbor Freight / Princess Auto cheapo dollies.
Next is onto the elevator... but that will not start for a couple weeks.
Wednesday 1 March 2017
Horizontal Stab - Part V
Slow progress, but progress...
Skins have been fitted... needed to trim the access holes for the forward and rear spar attach points. Both needed a wee bit of widening.
Also my priming job was a bit lacking, so I needed to respray the skins. Learned that I need to do less pieces in a single shot, and build some better jigs for holding everything while spraying. Not hard... just needs to be done.
So, the skins are fit and the access holes have been trimmed. Onto assembly!
Jig... need a jib to have access to the underside of the skin so it can be riveted. I pondered this problem for quite a while, and came up with the above. 10' 2x4 suspended over the bench, and the forward spar clamped to it. Whatever you are riveting needs to be FIRMLY clamped. With this jig, the skins can hang under the jig, so I can access inside for bucking purposes. Like so...
Along the way I learned that while the END of the jig is really good for riveting, the unsupported middle was not - and it was consistently providing smiled rivets. After drilling them out and driving them again, and getting MORE smiles, I figured something is wrong. I am GUESSING that the jig is bouncing during riveting, hence the smiles.
NOTE: The rear spar is only clecoed in place to help with stability while in the jig.
Jig modifications necessary... So I built a brace to clamp to the rear spar, and have wedged a 2x4 strut under the from beam. The strut will help until I put on the other skin, then I am going to have to figure something else out.
So first line of rivets all done. I am training my 11 year old helper the finer points of bucking rivets... he is learning fast...
Monday 20 February 2017
Horizontal Stab - Part IV
Have not posted in awhile, and been busy on a number of fronts: being sick, kids being sick, snow, cold temperatures, etc - all has slowed down progress - but not completely!
So everything has been drilled, cleaned, alodined, and primed. I had to wait for a high single digits day (degrees C) to get all this done - but it is DONE!.
Since last post, I drilled the spar caps that tuck into the U shape of the spar:
Everything has been alodined and primed:
The spar webs have been riveted into place, alone with the aft spar attach bracket (had to order one, as my kit seemed to be missing this part)
The nose and main ribs have been riveted into place (thank is a big part to my 'helper').
Next steps:
- Fit skins, and check the cutouts on the bottom for the forward and aft attach brackets.
- Rivet the bottom of both skins, leaving the nose ribs and main structure exposed and ready for inspection.
Unfortunately (or fortunately, depending on your viewpoint) I cannot completely close up the structure until it has been inspected (Canadian regulation). My MD-RA 'letter of intent' has been sent in, and I need to request inspection of all the tail components. Will do this after the elevator is ready for inspection - that way the inspector can do all 3 in one $435 dollar job...
My 'helper' has been bugging me already today "are we going to work on the airplane tonight"? So hopefully we will start riveting tonight assuming everything fits as it is supposed to...
Subscribe to:
Posts (Atom)


