Search This Blog

Showing posts with label Ailerons/Flaps. Show all posts

Friday, 14 November 2025

Starting to look like an Airplane...

Slow but satisfying progress.


First door installed.  Starting to look like a finished airplane (kinda).

Working on the doors (silpruf between window and doorframe) and ailerons in parallel.  The temp has gotten cold so doing the door silpruf at home.  On my last tube... which is PERFECT.

Right aileron installed.  Push rod not connected yet.  Balance is spot on with the servo tab installed.  Still need to install the pushrod for the tab.


Getting all the bits together for the fuel vent.  Everything sealed and installed.


New connector for the wing tip nav light / strobe (forgot to take picture).  4 position Deutsch bulkhead connector.

The weak bit of the wing tip broke by the fuel vent, so its coming apart.  Need to strengthen that section.  Easy yet time consuming job.


Flap adjustment for full travel, stops and cable tension.  Works like butter.  So happy and grateful.

Prepping the next door for the silpruf layer between the window and the door.


Right wingtip vent assembly.  New connector for the wingtip light.

Aileron in place, but needs spacers, etc.

One last door to silpruf.


Tuesday, 22 November 2022

Flap Position Sensor

Ever done something that you know is (close to) useless, but do it anyway?  And spend way to many hours in the process?  Yeah, been there.

The Advanced system on the ACM flaps / trim connector has flaps, aileron and elevator trim - both motor drive and position sensors.  The Sportman has manual flaps, so no need for the motor - but I want the position sensor (which is stupid me thinks).  I had the sensor, so it was just a question of mounting and wiring.

I ran all the wires from the FLAPS-TRIM connector.  Aileron trim is run to the right wing connector.  Elevator trim bundle is curled up in the back of the fuselage, and the flap bundle was sitting in the middle.

The bracket for mounting the sensor is deceptively simple.  Mounting it (using 2 adel clamps) is the challenge to get everything to line up and have nothing touching.

If you are going to do this (don't), get the 1.2" sensor.  Where I mounted it needs about 1" of travel, and I set it for about 0.1" of slop on either end so its not bottoming out.  The 'arm' is just a piece of welding rod, bent.  Yeah, that took 3 goes to get a good one.

Cutting to the end... Flaps retracted


Flaps extended


Wired and labeled.  I used solder sleeves.  Don't know why, because I hate them.  But in this application they seemed like the right choice.  I didnt shrink wrap everything like I usually do because I know these will break at some point.


There is a loop in the cable for WHEN the STUPID 26 GA wires break, there is enough slack to resplice.


Wednesday, 19 August 2020

Wings, Ailerons and Flaps - putting it all together

Wings, Ailerons and Flaps

Its a really cool point in any project when you start merging components into assemblies.  Always has been my favorite part of any project...

Flaps.... in hindsight, the flaps were easy :-).  The hardest part is mounting something that is 10' wide by yourself.... however, the wing stands worked really well for this.

At first I really struggled putting all the hardware together.  Bushing, bearing, end caps, washers bolt and nut.  Once I figured out that you take the bushing, bearing, and caps and get them in the track, roll them into position on the flap bracket, drop the bolt and washer in and you are done.  Makes it way easier.


The videos of the ailerons wont load unfortunately.... but they do work.

The hardware for the ailerons is quite complex.  Spacers, washers, all 'stacked' together using super glue.  I used a sacrificial bolt to stack everything, and kept the actual bolts for 'good'.  Again, using the wing stands to hold everything in place.

NOTE:  I had zero luck trying to adjust the aileron push rod while installed.  It has to come out, and that is a PAIN.  Also, both ends are right hand threaded, so you cannot adjust the length with both ends installed.

Because of how I purchased the fuselage (already on its wheels), I decided to do all this work with the trailing edge about 5' up.  For me being 6'2", not a big deal (I still did whack my head a couple times... cannot wait for the extended gear and big tires).  Having it at this height does make it easier to get under the wing and through the inspection holes.  Some people have the fuselage sitting about 1' lower - this means you dont need a saw horse to work on the top of the wing, but it would make getting under the wing a lot harder.  Personal preference obviously.... I liked doing it at this height personally.

So once all of the control surfaces are in, then its onto control cables.  Well, this has taken me a week (of weekends and evenings).

Need to make the cable guides.... not hard, except you cant get a pull rivet gun in to pull the rivets.  So, I used #6 bolts and lock nuts.

Keeping the cables organized is a big deal... and I have failed at that.  Its better, but still not 100% right.  But I do know that everything is going to clear, which is the intent.


The actual rigging was interesting.  There are a lot of variables:

  • Cable Lengths - and more specifically, how long do you want them?  There are multiple cables that make up each flap / aileron cable, and at least one of them per function are not terminated
  • Starting point of turnbuckles
  • Desired cable tension
  • Obtaining correct amount of bell crank arc and starting / ending position
Flaps:

I started with the flaps.... because that is what the manual said to do.

The flaps are easier and harder all at the same time.

First off, you need a method to hold the unterminated ends together while going through this whole process.  I decided on these from Home Depot :


You need to use the 3/16" size.  The 1/8th cable wont fit nicely.

First off, put on the heat shrink that will eventually go on the nicopress sleeve.  Next ensure you have a thimble on your connection point, then put on the sleeve, and get some tension on it.  Then use the cable clamp and lock it into position.

For best results, butt the cable clamp RIGHT UP against the nicopress sleeve.  If you can get it nice and tight, it makes crimping easier later on.

Once you have all off the places to be crimped held in place temporarily, then comes to fun of getting the cable lengths and tensions correct.

For the flaps, the goal is full RETRACTION.  Right up against the flap track.

Tension the retraction cable so it pulls up against the forward edge of the track.  Then add in the deployment cable.  You will need to add / remove tension to get everything just right.  I think I did  it no less than 12 times.

So if you think that is bad, the ailerons are worse...

What I found worked:
  • Set the aileron neutral position.  I did so using jack stands.
  • Put in the crossover cable, and set some light tension
  • Add in the left / right aileron cables.  Center the control yoke.
  • Adjust cable lengths, apply tension.
  • Verify aileron travel
  • Make stop plates.
So at this point I have a bas rigging setup on both the flaps and ailerons and everything works.  I am jumping ahead and making the crossover cable guide pretty quick and will put in all of the final hardware and cotter pins and lock everything down for the trip back home.

2 things left to do, and then it all comes apart.


Sunday, 2 August 2020

Ailerons and Flaps - Part III

Progress has been good.... 

Flaps are complete...


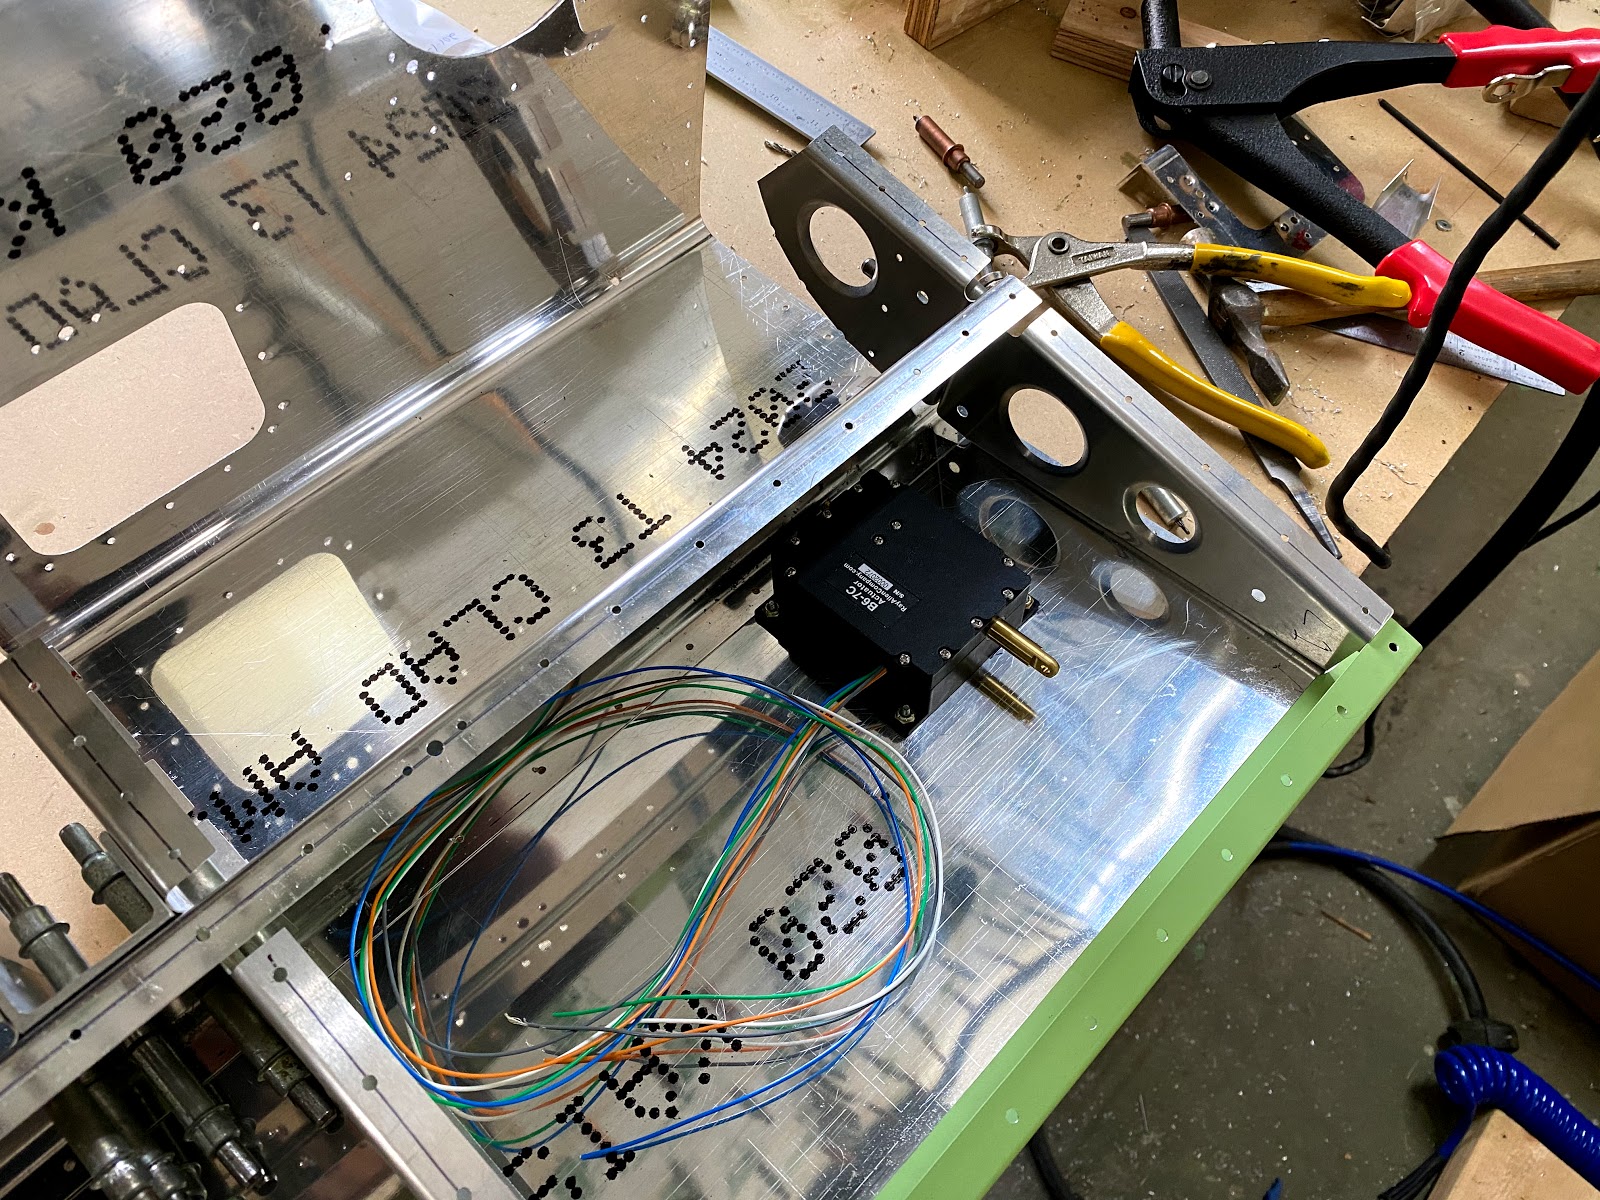
Riveting bottom of right aileron and wiring for servo


Last thing on the aileron is to cut the slot for the counterweights.  That will be done later on, after they are hung and the control cables run.


Friday, 3 July 2020

Ailerons and Flaps - Part II

Progress.... gotta love it.  With everything that we normally do it a year being cancelled, I have gotten a LOT done on the Sportsman.  Coronavirus is obviously a tragedy, but having time to build is a side benefit.


Drilling the bottom skins of flap #1


Flap flipped over, and lining up the top skins for drilling


And drilling


And more drilling...


All drilled - top and bottom.  I used 4 x 4 blocks to raise it up, because I had a bunch of ends left over from my son's woodworking project.


Everything primed or being primed after cleaning and alodyning.


Structure on the jig, ready for skins.


Getting ready to rivet the flap bottoms.


All riveted, ready for inspection.


Riveting the top after inspection.


Top al riveted, except the trailing edge - which I glued in place prior to riveting.


Glue and aluminum angles in place, drying.


After dry, without the angles.  Rivet time... There are almost 100 rivets just on the trailing edge.  As the surfaces to be riveted are not parallel, I took a flat die and angled it to match the difference, then used a pneumatic squeezer (very carefully).  Only screwed up 1 rivet, which was replaced.


Left aileron post inspection, ready to close!


working from the nose ribs back, plus around the inspection cover doublers.


Top all riveted except along the trim tab.  Checking to make sure it all fits before riveting.


Riveting completed.


Glueing the trailing edge of the anti-servo tab prior to riveting.


Glueing the trailing edge of the left aileron prior to riveting.

What's next:

  • Need to finish riveting the trailing edge of flap #2 and left aileron.
  • Rivet bottom right aileron
  • Wire servo tab and route wires (prior to riveting)
  • Finish riveting right wing, plus a couple on the left wing
  • Plan is to finish all the above before the end of July, and everything goes to the airport in early August (assuming I can get a hanger) and mount the wings and set the angles, cut and drill the struts, push rods, control cables, etc.

After all the above is complete, wings will come back home and work on systems.  Fuel tanks, plumbing, fuel pumps, wiring, pitot static, etc.

Progress is good...


Tuesday, 9 June 2020

Aileron and Flaps.... Part I

So the wings are progressing well.... bottom of the left wing is 99% riveted (just a couple bent ones to fix), and the right wing is probably between 40 and 50%.  A few hours and the right wing will be done.

But, I needed a break... so I decided to 'just whip the ailerons together'.  Boy, was I wrong.  


Looks easy, right?  That was less than an hour....


Hinge brackets forward of the main spar...


Drilling the skin bottoms.... this part goes pretty fast, especially when you have both setup at the same time.


Inspection hole covers on the bottom... these allow access for the bolts to go through the hinge bracket. 


Flipped over.... drill the tops.  I use steel weights to hold everything in place.


So this was fun.... cutting the aileron skin for the trim tab.  I debated on how to do this for awhile, and finally settled on a jig saw with a throw away piece of wood underneath for the long cut, and a Zip disk on a Dremmel for the short cut across the joggle.  I stressed about this way longer than it took to actually do.  Then cleaned it up with a file.


Similar plan for the inspection hole for the servo.  Used a jig saw, with a 1/4" piece of ply underneath for support.


Anti-servo tab cleecoed in place.


Inspection ring for servo in place.


Electric trim servo tab cut and being fit.


Servo temporarily installed.


After alodyining and priming, reassembly begins!


I built a simple jig that sits on top of a portable table to clamp the spar to, but allow ready access for riveting.  Block on the trailing edge that clamps to the wood top as well for stability.


At this point (bottom skins of both ailerons riveted), then get put away awaiting inspection.

So, onto the flaps.  My goal is to get both the ailerons and flaps inspected at the same time.

Below is all the hinge brackets.  3 pairs per flap.