Search This Blog
Monday, 15 September 2025
Keep on truckin...
Sunday, 7 September 2025
Progress... getting on a roll.
Tuesday evening... (Sept 2, 2025)
Pin keepers installed in the stab / elevator / trim. THAT was a challenge solo. Thank god for the body work stand. I use that thing ALL THE TIME.
I was flying solo tonight, so had to get inventive on how to hold the elevator up. Tape worked!
Peeled a lot of tape off the front window... looks reasonable, but not perfect. I think I can fix the problem areas. Also got some silpruf on the interior, but it is coming off with a bit of effort. Forgot to take a pic. 2 days until the clecos come out.
On the last engine run the pipe off the turbo had a shake. It was only supported with 1 mount, and its a long pipe. Added a second mount at 90 degrees (roughly). I think this will work. It is definitely less 'shakey' just wiggling it.
That was a 3.5 hour evening. But it was definitely progress.
Front window came out of the clamps!
Looks pretty good.
Put lock nuts on the new exhaust clamp... I found some.
Installed Deutsch connector under the tail cone for the rudder trim. The bulkhead connector finally arrived from China.
Next was the bead of silpruf between the window and fuselage. Lots of cleaning of crap out first... my theory is to get all the leftover crap out. The 'dressing' needs to stick on all 3 sides. So lots of pulling out the leftover bits (I could have done a better job during the insertion of the window... being honest). Then taping the gap...
Thursday, 28 August 2025
Window 'dressing'
I don't know the offical term, but I call it window 'dressing'. Filling the gap between the edge of the joggle and the window edge. That gap that us builders take so much time to get right.
I received the fuselage back from the paint shop first.... so the starboard side window and two top deck windows were 'dressed'.
Standard process. Clean out the joggle, tape, cut with fresh blade (use thick tape... easier to cut), squirt in the silpruf, smooth out with tongue depressor.
3 done... 4 more to go. Front window went in today, so that job is a week away at least. Doors should be back next week. My back hurts just thinking about this.
Oh, and I silprufed around the lift points too...
Windows - Part III: The big one...
As the title says, onto the big one.
I've had it home for a couple days and have been looking at it, moving it around, and thinking a lot.
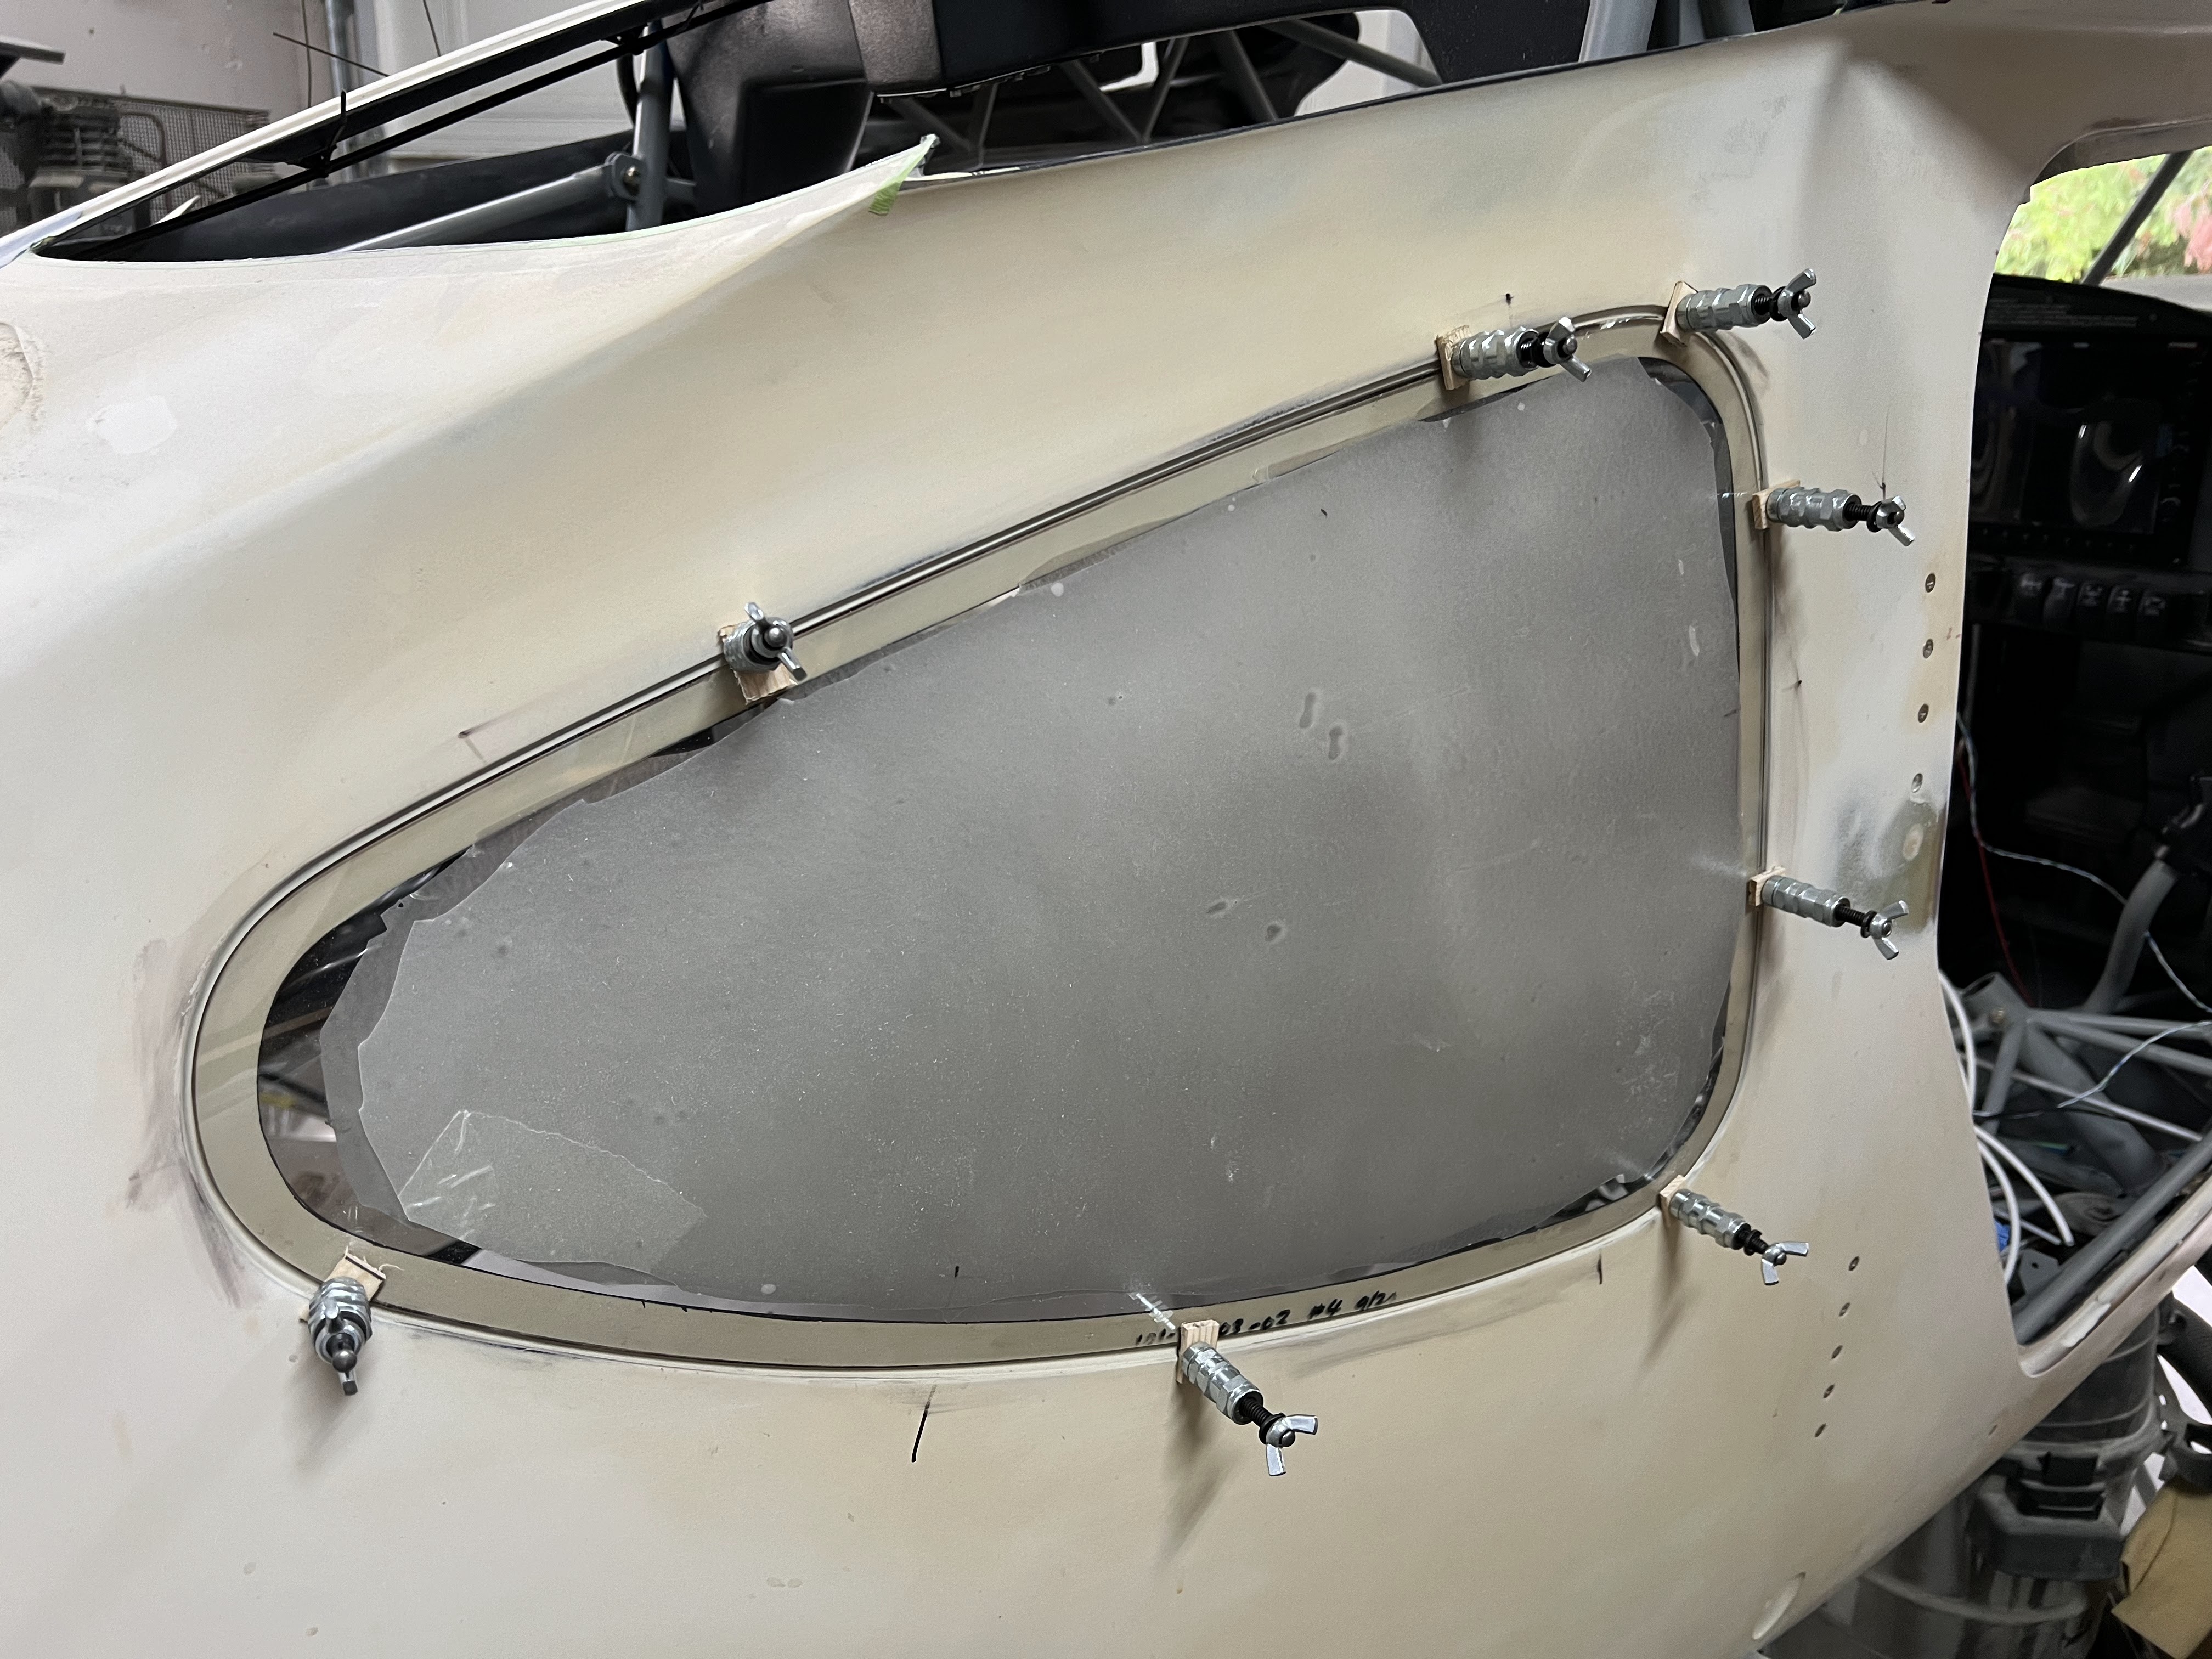
My first realization is the window was not fitting in the top joggle, which is bringing the window up and the front. Lots of overhang on the pilots side, but little to none on the copilot side.
So I called the master for advice. Bottom line, there is no one size all solution... you have to look at what you have and what you want to achieve. My first thought was get the top joggle to fit, but Zach said not necessarily. I know I need to bring the window to starboard, so work the top joggle on that side first. Then start the front to get it to fit.
The window keeps wanting to slide forward. So I am going to make some blocks that can be clamped on to hold the front in place temporarily.
I finally decided to jump in and start trimming. I trimmed the edges on the top joggle to get the window to fit. Trimmed more on the copilot side as that is where I had less overlap on the lower side of the window.
It must have been 12 iterations of on/off/on/off. I really dont want to have to buy a new window.
So now I am trying to get the front to JUST fit into the joggle.
It was at least 20 trim cycles to get it in. Once I had the top fitting, i focused on the center of the lower edge and then worked my way out. The goal was just enough gap that I could get a cleco in. Next is the sides, and then finally I can start working on a consistent 3/16 gap all around.
- Place silpruf standoffs every 6".
- Place clecos where you need them to get the window to sit right.
Sunday, 22 October 2023
Windows - Part II
While the pilots side top deck window is trying (and the cowl), figured I would start on the next window.
What I learned from the first window:
- Put in more silpruf. I believe there is enough in the first top deck window, but I didnt get the squeeze out I was expecting. But I did get squeeze out around the entire perimeter - just not as much as Zach in the videos.
- Wet erase pens are truly disposable. When they get to fat, chuck em (or use the for something other than windows)
- Review the instructions. I made some simple mistakes on the first one
- Take your time with the taping. When doing a more than 90 degree corner, it really wants to lift.
- Lock the window in place with wing nut clecos in the corners FIRST - not later.
- Take your time with the trimming. I did OK on the first one. The angle grinder with the disk is so much faster.
- The double tape line on the bottom of the window is critical for a nice aesthetic appearance. Make sure it is truly stuck down, and the overlaps are correct. I had one portion shift, and tried to retape tape #2. Its not horrible, but not perfect.
- When you mark the tape line on the joggle, you get wet erase marker on the edge of the window. DON'T FORGET TO CLEAN IT OFF.
- When 'smoothing' out the inside of the window, make DOUBLY sure that you cover the gap between tape #1 and #2 with silpruf. Also, when smoothing out between the window and the window frame make sure it is packed with silpruf.
- Get more than qty 20 #40 wing nut clecos. If you are going to do multiple windows at once, you need more. 30 would be good. The pattern I have fallen into is do a window, and while it is curing move onto the next. Once I got to window #5 I could have a window trimmed and clecoed in less than and hour. Sanding and taping is probably a good 2 hours.
- When removing the tape from the gap between the window and outer window frame, I started running a razor blade along the window edge to make sure that any silpruf that you didnt squeege out is cut away from the window. THEN, pull the tape from the door / fuselage TOWARDS THE window. In fact, on # 4 I pulled up all the outer tape around the entire permiter first, and then just did the last 1/4". There was virtually nothing left in the gap between the window and frame.
- Take extra time when taping the inside of the fuselage / door, and make sure that the edge is sanded well and there is no paint residue on the edges. This will help the pen ride better, and gives you a better edge to tape / cut against.
As our weather is getting cooler, going to do both of the rear windows in one shot when bonding as I have to keep the shop heated for a couple days.
Its not bad... There are a couple areas where the silpruf is a bit thin. I maybe think I can maybe fix it (without making it worse), maybe. The lesson learned here... when the window goes in and you are 'smoothing' out the silpruf on the inside, pay attention to fill in the ~1/16th gap between where tape #1 was, and where tape #2 is. That is where I am thin. I did a much better job on this on the first door, because it was not mounted and I could see the gap (and I knew to look for it). Hopefully that one turns out much better.
The goop on the window would not come off easily this time... so opted to take it all off (which was far easier) and retape the center to keep down on potential scratches. There is still the goop on the edges of the window which should come off easily with a bit of sand paper or razor blade.
1.5 windows ago, I switched from a random orbital sander to a angle grinder with a hook/loop pad. Way, way, way faster... but scarier as the material comes off way faster. Just need to go slow (but its still 4X faster than an air powered random orbital sander). Was looking for a hook and loop pad, and most of the ones I found were RPM limited. This one on Amazon canada is aluminum and is good for 9000 RPM. Using a Ryobi cordless angle grinder.
Now the 2+ day wait to see how it turns out. It is very nice to be able to flip the door over to work on both sides with lots of light.
And I don't think I did something different, but on the aft fuselage window and aft door window, the drill / cleco punctured the inner skin / paint. That did not happen on the front door, which I am VERY thankful for. Less filling / repainting.
I am all geared up to attempt to bond in both front windows one after the other. Everything is trimmed, fit, sanded, taped, cosmetic layer applied, etc. Just need to apply the silpruf, cleco it in, and do all the steps required beyond that. Will see if I am crazy or not. Its actually not as bad as it sounds as I have 4 or 5 hours between them based on the silpruf cosmetic layer application... but will still be the same day.
They are in the house so I dont have to heat the shop. Shhh.... dont tell my wife. But in reality they do not smell at all.