Search This Blog

Tuesday 28 December 2021

(One of the) Best Tool(s) Ever

 I have been dreading a lot of the adel clamps that I have to install.  I hate them, they are a pain, your fingers hurt, and then trying to get a washer and nut on is just not fun.


Available both at Aircraft Spruce and Amazon.

You put the awl through your adel clamp assembly, then the clamp (basically a vice grip with a notch cut in the duck bill) slips around the table on the clamps.  Lock it in place, remove the awl, then slip you bolt in.  Voila!  Done.

I no longer hate adel clamps quite as much...


Park Brake

I've always wanted a park brake.  The Emeraude doesn't have one, and I think it would be really nice to have.

On my ongoing quest to keep everything as far forward as possible... I have put the park brake under the centre tunnel, just aft of the rudder pedals.  I have been advised NOT to put it here, as it is a pain to get to (yes it is).  Usually this assembly is placed under one of the front seats.  I have a feeling I will be moving it one day...

McFarlane makes really nice locking controls, that can be custom engraved...


The park brake valve is from Matco.  Seems to be the standard valve that everyone uses in Glasair land.

When I was installing it, I pulled the cable out too far, and heard this tiny metallic 'bounce, bounce, bounce'... luckily I found it, a tiny ball bearing.  Without it, the lock does not work.  Luckily I am not the first one to do this, and McFarlane has a procedure to reinstall it on their website.  


Top down and side views.

This one is done...


Monday 27 December 2021

Overhead Console

 Zach Chase (Fibertech Composites) builds a really nice piece that mounts to the ceiling of the Sportsman that allows for a nice spot to mount headset jacks, or whatever is needed.  I purchased almost all of Zach's stuff in 2021.

The Overhead Console is a molded fiberglass piece that mounts around all the various tubes - however, the cutouts are marked, but not cut due to many variations in the build.

After initial cuts and fitting, it is roughly in place.


A bit more tweaking, and it is 'loose' in place.  Next step is to drilling and fitting the aluminum inserts.


At first I was not going to bother cutting these open right away.... but if you don't, you have no way to gently pull the console cover away from the tabs after it has cured...

The composite L brackets come pre done from Zach, and with hardware.  Just need to mate them up...

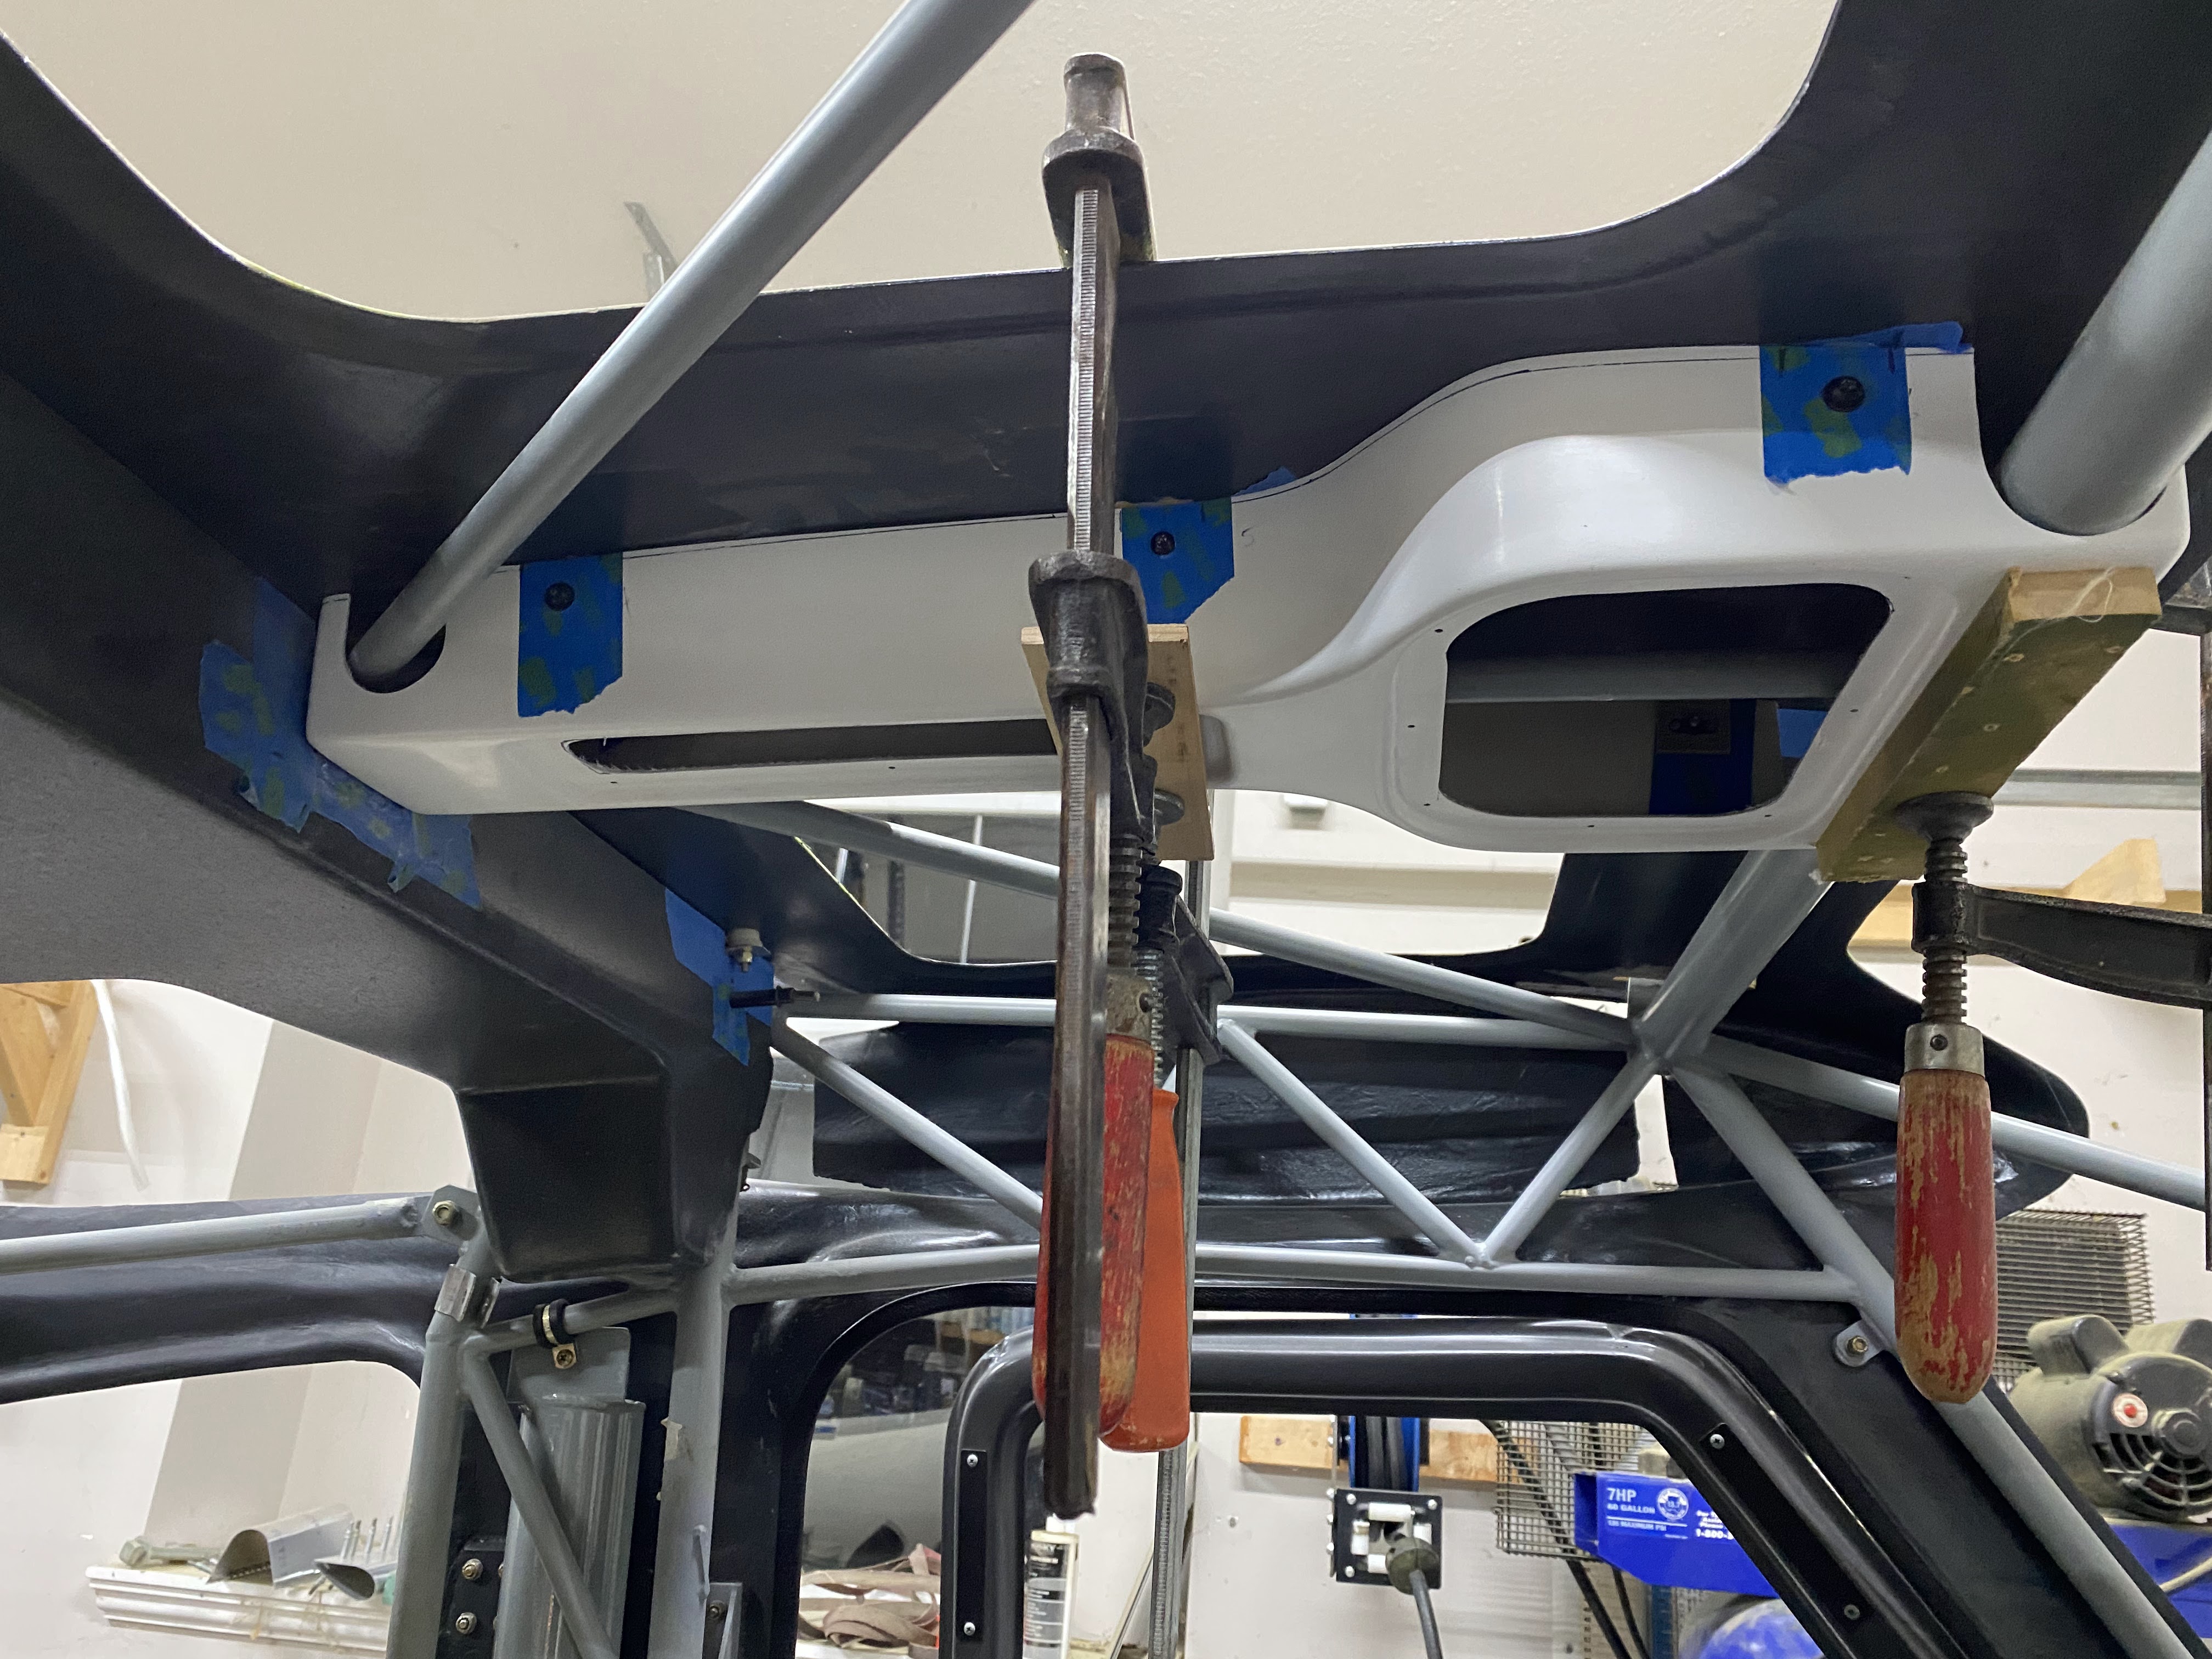
Roof sanded, adhesive applied, and console clamped in place.


Once cured, take the clamps off and remote the screws.  This is were I screwed up.... Zach's instructions say to cover the console cover around the tabs with packing tape.  I didn't, just used painters tape.  Bad idea.  If I was doing this again I would use packing tape, and then put a bit of wax on the inside.  You probably know where this is going...

Of the 6 tabs, 5 released cleanly (reaching up through the openings and popping the cover off the tab).  One did not...


Time to do some composite repair...

Repair finished, console painted.  Test fit of 'stuff'.


With the aluminum plates wrapped in vinyl


Drilled, fasteners installed, and temporarily mounted in the aircraft.


Need to do a bit of touch up on the roof, and route the cable back to the tail.  Other than that, this one is DONE.


Sunday 26 December 2021

5 years in, and still going strong...

I started my Sportsman project at Christmas 2016... Xmas 2021 is 5 years.  I was hoping to be done in 5 years, but obviously not.

Here is the short version of what has been accomplished in 5 years:

  • Horizontal Stabilizer, Elevator and Rudder complete (including inspection) from standard kit.
  • Wings, flaps, and ailerons complete (including inspection) from standard kit.
  • Fuselage - quick build, purchased partially complete in 2019:
    • on its gear
    • tail dragger conversion
    • Service Bulletins
    • interior paint
    • firewall template, plus all firewall components fitted (fuel filters, batteries, cabin heat, relays, ground blocks, etc)
    • header tank
    • wing struts cut
    • instrument panel 'virtual' layout, components ordered
    • overhead console 90% complete
    • park brake
    • overhead cable cover cut and fit
    • rear seats 80% complete
    • baggage floor purchased, need to fit
    • battery box
Its a pretty long list.... the wings alone took me just over 2 years to complete.

'Life' did get in the way a bit.  
  • Built complete bedroom set for my eldest daughter (between finishing tail and starting wings)
  • Built breakfast nook for eldest son.
  • My youngest son started racing quarter midgets, which took up over half the weekends for a year and a half.  2018/2019
  • Building my son a new racecar, along with my father-in-law and son.  That has been ongoing from late 2020 through early 2022.
  • Plus work, kids, etc, etc.  COVID definitely helped with the build.  Prior the to pandemic, I travelled 1 to 2 weeks a month.  As of December 2021, I have not travelled for almost 2 years.
What I learned from the past 5 years:
  • The build never goes as fast as you planned.  Deal with it.
  • Building is a hobby, and is on the bottom of the list for the family.  Deal with it.
  • Plan the build, build the plan.  When you go out to the shop, you need an objective in mind.
  • It's a thousand little projects.  Do not treat it as one big one.
  • If you aren't happy with something, start over.  Trying to fix something will take longer, and be of lower quality.
  • Do something every day, even if that is just reading the manual or buying a part or tool.
  • "When you don't know what to do, do something".  If you are stuck on something, pick something you can do and do that.  Even if its just deburring a hole.  Then move on to the next thing.
  • Decide what your objective is.... building or flying.  As soon as you stray from the plans you have opened up a giant time suck.
    • Example:  I decided to build my own rear seats as I thought the $4K from Glasair was too expensive.  First off I had to design them, then build the metal components, then fit them, etc.  Then I had to learn how to vacuum bag, and get all the materials to do so.  Then there was all the fitting and finishing.  I have been at it for almost 3 months.  Now I know why the kit is $4K.
    • Example 2:  I decided to go with a UL power engine.  Modern, FADEC, lighter, etc.  However, there are no kits for this engine - so you are completely on your own.  UL power requires a header, which I decided to mount on the forward truss assembly.  The UL filters and pumps do not fit in the stock locations, not will they fit under the stock covers.  So all of that had to be designed, material procured, built, fit and finished.  On the 3rd go round, I finally got the top cover right.
  • I miss flying.  I have gone from flying 60 to 70 hours a year, to 15.  When everyone else is hanging out at the airport, I am going home to build.
It's been fun, but I am doing this to get an airplane.  I doubt I will build another one.