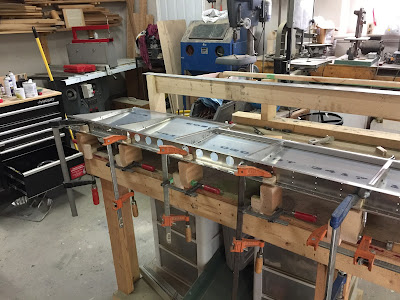
So I **THINK** my method for raising the elevator to leave the clecos in place worked.
I cut up some sections of 2x4 and clamped them to the front of the bench, then put additional blocks along the ribs and rear spar to lift the whole thing up. Used the level method, same as the Horizontal Stabilizer to check for level along the entire structure. It should be perfectly flat.
Elevator control horns...
Control horn placement, ready for drilling.
Getting ready for the top skins. You can see my method to raise up the elevator to leave the top skins and clecos in place for drilling the other side.
Cutting the hole for the trim servo. NOTE: This is done per the manual, but the slot does not line up with the wiring harness coming out of the servo assembly. But, you an line it up, drop it in, and then slide it into place.
Disassembly and alodining, ready for primer.
Primed. I ws tired of hanging the parts and having to hold them while priming. The ribs are so light that they fly around under the spray, so I figured I would try a board. This is all parts of the wing crate chopped up. Worked OK - much better than hanging them from a wire, but still not ideal.
Riveting the doublers in place. A friend loaned me his pneumatic rivet squeezer. Wow... I squeezed all 88 rivets in less than 1 hour. I can't say enough about properly clamping all the parts in place prior to riveting. Sure makes a nice job.
End doubler on the main spar, all done. Turned out quite nice.
Rib A / B, with doublers in place.
Center section ribs riveted to the aft partial spar.
Top skins clecoed to the structure, ready to rivet.
What's next:
- Rivet top skins
- Place counterweight ribs and rivet
- Flip over, rivet control horns in place, rivet bottom skins
At that point, the elevator will be put aside awaiting inspection before riveting skins to spar, and spar to ribs. Will get the trim tab assembled, but I anticipate that will be quick. Will be submitting the inspection paperwork in the next couple days.


No comments:
Post a Comment