The build manual gives to options for gear leg fairings. Aluminum or Fibreglass.
For aluminum, the fairing is two pieces (an upper and lower due to the flex in the spring gear), and wrapped over the leg, with a foam support structure to keep its shape, with a piano hinge on the aft side to hold it together. The brake line runs down the aft side of the leg, and holes are drilled in the foam for it to run through.
For fiberglass, the brake line is bonded to the aft side of the leg, and then foam is glued over top and shaped into an airfoil shape (using the front side of the leg as the leading edge). Fiberglass is layed up on top of the leg / foam, and then finished.
The kit comes with material for both options.
The below describes my 2nd attempt. The first didn't work out quite right. Close, but not close enough.
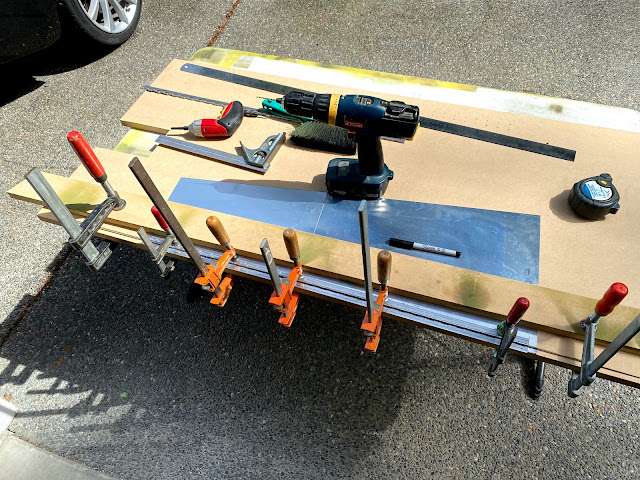
The trick here seems to be that you need the piano hinge to line up exactly the same on both sides. I accomplished this by laying both pieces of aluminum on the edge of a bench (leftover from my wing jigs). Clamped it down, and then laid the piano hinge down and drilled it in one piece over both sides - with the intent to cut it later.
I predrilled all the holes on the piano hinge, then clamped it down to the table as well.
Once I had drilled everything I could, I drilled some extra deep holes into the wood and clecoed to the bench. Then I could remove the clamps and drill the last couple holes
To put the bend in the skin, the manual recommends wrapping it around a broomstick. On my first attempt, I wrapped it around an axle, and it worked OK. However, the RV guys use a trick to bend their ailerons and flaps.... Make a channel slightly wider than your bending form (AKA broomstick), and then lay your material down, and force the broomstick into the channel.
I raised my tabletop up off the bench to get clearance. I had some scrap MDF strips laying around (about 3" wide) and clamped them to the top. Again, needs to be a hair wider than your broomstick. Mark the centrelines on your piece, line it up, and push the broomstick down.
I used clamps to force the broomstick down. In the past I had glued / screwed this contraption together, and then you can just straddle the piece and step on the broomstick. Clamps work once you get them aligned.
This also worked out nice for taping the trailing edge. Leave the piece in the form, apply tape (I used Gorilla brand duct tape) to one side, then aligned and pinch the trailing edges together and push the tape over the top. Worked out real nice.
And voila! Bent and taped...

The above is both pieces (upper and lower). I fed the lower down through the top to check the overlap. I need to take about 3/32 off the lower piece before drilling the other half of the piano hinge.
You can see my first attempt the lower part of the gear leg. Also, you can see the mounts I have made...
After trimming the lower leg to fit inside the upper, I marked and drilled the 2nd half of the piano hinge using the same method - but with the 2nd half of the piano hinge clecoed in place.
At this point, the piano hinge is still one piece. I figure this is the best way to make sure it lines up. Need a small gap between the two halves so there is room for it to wrap around.
Two halves joined with the piano hinge. The alignment is pretty good. The lower half needs a small trim on the trailing edge for them to line up perfectly. The nice thing is its super easy to see now. Will take it to the sheer in a couple days.
Overlap detail. No real way around this.
Left hand gear leg fairing installed.
I am fairly happy with this one.
Now I just have to replicate it one more time...


No comments:
Post a Comment