Search This Blog

Thursday 29 August 2024

Wing Fold Brace

I learned a valuable lesson.... when you think something is wrong, don't do it!

When building the wings, I put the fasteners in for the wing fold eyebolts inboard on the foward spar - just like the manual and ANOR says.  I found the kit and all the pieces.  I grabbed the eyebolts that go into the fastener on the wing, under the main tank.

I thread in the right side by hand until I could not turn it any more, and then used a screwdriver through the eyebolt to wind it in the rest of the way.  No problem.  Then the left.... I start winding it in and SNAP.  The eyebolts were drilled on the shank... and it snapped at the hole.  So now I have a partial stud in the wing... and no access on one side.

After lots of thinking....

Plan A:  Try to back the fasteners out with a flat blade screwdriver using the slot in the tail.  Nope.

Plan B:  Drill the stud remaining and use an easy out.

Plan C:  Drill, and step the drill side up slowly to break the stud apart and remove the pieces.

Plan B did not go great... the drill wanted to walk on the slot, so the hole wasnt straight.  Drilled up to 1/8" and got the easy out in, but it did not want to budge.  Drilled up again and got the pieces out.

Ran a tap through the hole.  Eyebolt FITS!

New eyebolts ordered from ACS.  My god they are pricey.... but they are needed.

Forward wing braces have been fit and marked.


And the wing even folds.

I was hoping to not have to install the cups in the fuselage for the inboard flap track to tuck into.  That did not work out... it touches and the wings are not fully folded.  So they have to be installed.


Monday 19 August 2024

Attaching the Wings!

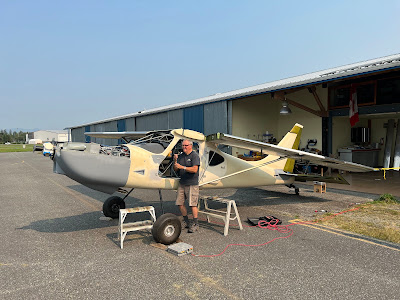
Big day!  Wings going on temporarily to fit the hatch covers, finish the wing bulkhead wiring, lights, wing tips, etc.


Right wing was super easy.  Bolt / pin in the spar, run the harness down the strut, top strut bolts, bottom strut bolt - done.  10 minutes.

Left wing... different story.  Could not get the forward pin the engage.  The upper strut bolts were finicky.  Just fought us every step of the way.  The pin will still not engage... message sent to the forum for help.

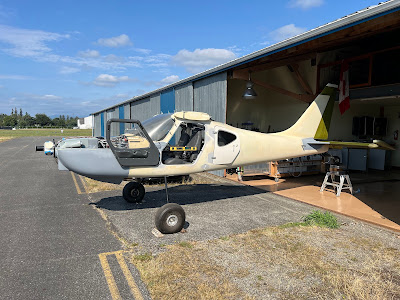
But the wings are on, and it looks like an airplane.

Lots of potential solutions for the wing pin.  My plan is to get the wing strut brace installed and go from there.


Sunday 18 August 2024

Preliminary Weight and Balance

The moments of truth... and planning... and engineering / guestimating...

The last time I weighted the fuselage was when the engine went back on in January of 2023.  At that time, the fuselage weighed 808 lbs.  Now she weighs 1060... with no wings, prop blades, etc.  


Big days coming ahead.  Wings next!

Monday 12 August 2024

Fuselage move to the airport!

Exciting day... all of the airplane bits are now in the same location!


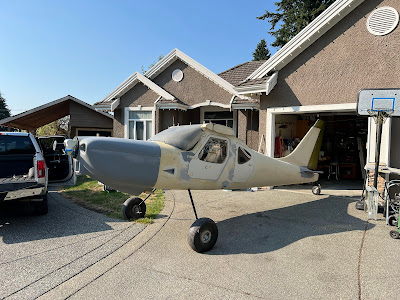
The fuselage has not been outside for well over a year.  You get a whole difference perspective when its not jammed in a small space...


The driver did a fantastic job of securing the fuselage for transport.  She bounced around a LOT during the drive, but stayed in place.  So grateful for that!


Safely in the hangar...


Airbox / Air Intake


Moving closer to the end...  Need an air intake for the turbo.

Lots of ways to do this.  My preferred method is to mount the box to the starboard side of the cowl and have it captive.  IE the filter and box and 'scoop' are all one.

UL has a part... which I was initially unimpressed with.

I bought a part from the US distributor, which initially I liked... but its very tight and restrictive.

So I am blending the two, and hoping for the best.

The box is the height of the filter that came with the engine, and I make it 6" square.


Drilled and clecoed.  The plan will be to have the top removable for filter cleaning / replacement


Pretty basic design.  I needed to tweak it a little bit, but now I need to mount it.


This is kinda sorta how UL does it... but I need to integrate in a alternate air source that bypasses the filter.

Now I have to build the scoop...  It is just going to be aluminum as well and NACA-ish, but not a NACA.


Next.... alternate air inlet...

The first challenge was to work out the angles... and not interfere with anything, and keep it away from the exhaust as much as possible.

I used a flange to get the size, and started with a paper tempate.  

The 'door' is a 2 piece assembly.  I want it to slide as nice as possible, so I used some high density plastic on the top that will contact the flange.  The two pieces will be flush riveted together, and the flange on the box will be flush riveted as well.

Mock up below.


I bought a 2" linear actuator from Actuonix.  Slick little unit.  They also sell a lit push button, which looks really nice (standard switch used in custom hot rods, etc).  BUT THE WIRING DIAGRAM IS WRONG.  And all the colours on the wires are wrong.  That was frustrating.


I am going to draw this up and it will be part of the electrical diagrams.

The best part is IT WORKS PERFECTLY.


All parts have be deburred, alodyned, and primed.  One fell when I was hangiing it and bent... and got crap all over it.  Will need to be sanded and redone.  All the rest turned out good.

I found some waterproof limit switches on Amazon.ca.  Super simple and inexpensive.  I mocked it up with the existing wiring to the LED indicator on the panel, and it worked as expected.  But I didnt do enough homework... the screws are really small.  Ordered these on amazon... I now have a lifetime supply of 2mm socket cap screws :-).


This is done, except for riveting it to the cowl.


Skybolt Fasteners

From where I sit today, I HATE Skybolt fasteners.  Why you may ask?

  1. Their part numbers are cryptic
  2. Their website sucks
  3. Their installation instructions are poor (and I am being kind)
  4. Tech support emails go unanswered
  5. Tools that will make you scratch your head....
However, there are some reasons to really like them (which is mostly why I ordered them).
  1. Their product are awesome (once you get through the part number soup, shitty website, crappy installation instructions, etc)
  2. They will readily swap parts (that you ordered incorrectly because of their shitty website, part number soup, etc)
  3. Shipping is fast and inexpensive (USPS)
  4. Infinite possibilities (lengths, fastener styles, adjustments, etc)
  5. Tools that work really well once you understand their function
So that is an even 5 for 5.

How I got to this point:  I have had the fasteners for months.  I played around with them, played with the tools, read the (shitty) instructions, and kept scratching my head.

And THEN I installed one in some scrap material.  NOW it all starts to make sense.


Drilling the holes for the fastener is easy.  Countersinking and riveting is easy.

  1. Drill your initial pilot for the fastener with a 3/32 / #40 bit
  2. On the inside panel, drill up to 1/8 / #30.  Use the Skybolt template - cleco in the center hole.
  3. Drill for the fastener mounts
  4. Countersink for 1/8" rivet
  5. There is an option to drill an offset hole for the locking pin.  If you read the instructions here, you dont need it unless you do not have rear access.
  6. Drill the fastener hole to 1/2"
  7. Rivet the fastener
  8. Drill the panel to be fastened hole to 1/2"
  9. Insert the grommet in the outer hole.
  10. Install the fastener using the SK-T26 tool.  Using the U shape slot to grab just below the spring, and the other side on the phillips head.  Compress the fastener, and angle it into the grommet.  It is now captive in the grommet.
  11. These are adjustable receptacles, so obviously you have to adjust them.  The instructions in step 4 show you how
  12. With the barrel unlocked and both panels lined up, push the fastener in and lock it with a quick clockwise motion.  Wind it in to your preferred depth.  Unlock it with a quick counter clock wise motion.  
  13. Remove the panel.  Pull the locking pin.  Using a flat blade screwdriver, wind the fastener barrel in or out so the lock engages
  14. Put the retaining ring on the grommet (I am not doing this until after paint)
The benefit to this system is if you have variable depths, you can get away with one fastener length - at least that is my theory.

You can adjust the depth down the road with a pick set.  Pull the locking tab up with a curved pick, and wind the barrel in or out to get the right depth, and relock by removing the pick.

Got the aft edge of the upper cowl done in an evening.


Couple things to note:
  • On the Sportsman when drilling the firewall joggle, you are drilling both fiberglass and stainless.  Bits wear fast.  I am going to go buy a 1/2" Milwaukee step drill - I have a 1" version and it is awesome.  They are not cheap, but they last.
  • Need to remember to position the pin in the right spot.
  • I clamped a backing board to the inside of the joggle when drilling.
I have not pulled the pins yet to set the depth.  Will do that once she is all painted...

Moving onto the lower cowl / fuselage intersection next.

After many months of doing other things, finally came back to this.


So I am half done now.  32 fasteners total, and 18 are done.

I need to extend the flange on the right side of the cowl slightly.  I cut it too short.  But after that, clear path ahead to get these done.

I buggered up one fastener, and had one that would not rotated.  Other than that they have been fine and great to work with.

Both sides are done... not thrilled with the fit (not an issue with the fasteners).  It's a function of how the cowl was extended unfortunately.

All are done now...  still not thrilled with the fit, but I think I can shim it where required.  I have not locked the fasters in yet (by pulling the pin), and the fasteners themself do not have the retaining snap ring installed... these will both be done after paint is complete.