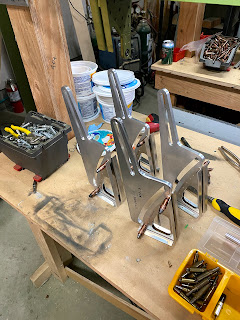
Lots of progress since the last update. With racing season over (at least the racing component), finally have some time to get going on the wings.
Aileron bellcranks drilled and primed... part I. After the attach angles are riveted to the bracket, they are then fit on the spar and drilled in place. Then finally the small attach angles are drilled in place and riveted.
Assembled bellcranks ready to be fit to the spars.
Small attach angles (4 per side) all cut and pilot holes drilled.
I drilled all of these little angles in place to ensure a good fit. Used a right angle drill and extended bits depending on the challenge.
Aileron hinges and bellcranks all riveted in place. I thought the hinges would be afternoon job... NOT.
Aileron pulley bracket. I clamped everything in place and drilled in place.
All the hinges, bellcranks, and pulleys for the ailerons fit, drilled, primed, riveted, etc.
Onto the flap tracks! Yay! I copied Ted Setzer who recommends rounding the edges and having the tracks anodized. This avoids chipping if painted.
Fitting the flap tracks. I cut a piece of wood the same thickness as the track and wedges it between the brackets to get the right spacing.
Flap bellcranks... initial fit. So the manual clearly states that the pilot holes here are drilled wrong. Why have they been drilled wrong all these years is beyond me (apparently its backwards compatibility with the Glastar). You have to reclock the arms... but how do you keep everything centered?
My solution was to get some washers from the Home Depot Aircraft Store... I trimmed them down slightly to fit inside the arms and spacers (just shy of 1.5" diameter), and inside the crank where the bearings go (just under 1" diameter). I then wedges the hole washer assembly together and reclocked appropriately.
Everything alodined... ready for primer.
Assembly...
All riveted together... looks like a mini Millennium Falcon!
Flap tracks back from the anodizer...
Flap pulley brackets... initial drilling and shaping.
Next steps:
1. Finish flap pulley brackets
2. Mount flap tracks
3. Mount Flap bellcranks and verify cable clearances
4. Remount and rivet all the main and cove ribs
5. Rivet the leading edge ribs to the skins
6. Inspection!


No comments:
Post a Comment