But, I needed a break... so I decided to 'just whip the ailerons together'. Boy, was I wrong.
Looks easy, right? That was less than an hour....
Hinge brackets forward of the main spar...
Drilling the skin bottoms.... this part goes pretty fast, especially when you have both setup at the same time.
Inspection hole covers on the bottom... these allow access for the bolts to go through the hinge bracket.
Flipped over.... drill the tops. I use steel weights to hold everything in place.
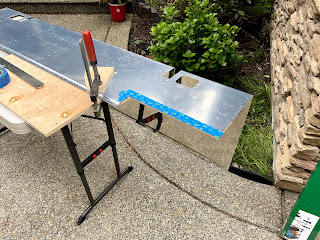
So this was fun.... cutting the aileron skin for the trim tab. I debated on how to do this for awhile, and finally settled on a jig saw with a throw away piece of wood underneath for the long cut, and a Zip disk on a Dremmel for the short cut across the joggle. I stressed about this way longer than it took to actually do. Then cleaned it up with a file.
Similar plan for the inspection hole for the servo. Used a jig saw, with a 1/4" piece of ply underneath for support.
Anti-servo tab cleecoed in place.
Inspection ring for servo in place.
Electric trim servo tab cut and being fit.
Servo temporarily installed.
After alodyining and priming, reassembly begins!
I built a simple jig that sits on top of a portable table to clamp the spar to, but allow ready access for riveting. Block on the trailing edge that clamps to the wood top as well for stability.
At this point (bottom skins of both ailerons riveted), then get put away awaiting inspection.
So, onto the flaps. My goal is to get both the ailerons and flaps inspected at the same time.
Below is all the hinge brackets. 3 pairs per flap.


No comments:
Post a Comment