Search This Blog

Sunday, 30 March 2025

Progress - week of March 24

The countdown is on... and continues.

Monday, March 24 - 14 days to go

  • Removed cowl
  • Drained fuel
  • Unbolted park brake valve... need to find the leak
Tuesday, March 25 - 13 days to go
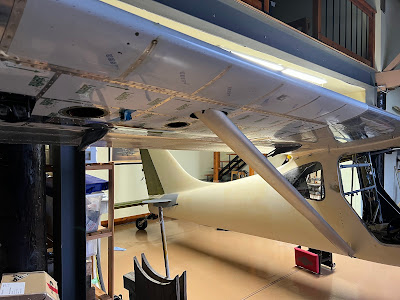
  • Fitted starboard lower strut fairing.  Still needs some tweaking, but its on.
Wednesday, March 26 - 12 days to go
  • Removed park brake value (that I suspect is leaking), which involved lifting the header tank and taking off the side skirts from the center tunnel.  Drained rest of fuel from header tank.
  • Cleaned up the mess.
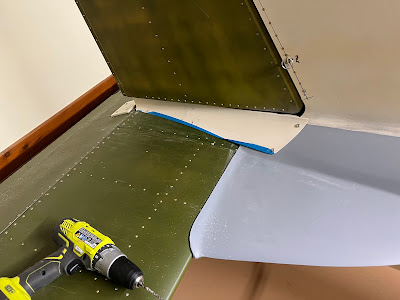
  • Tweaked and sanded wing tips
  • Drained rest of the fuel.
Thursday, March 27 - 11 days to go
  • Night off... LAAA meeting
Friday, March 28 - 10 days to go
  • Final fitting of fuselage struts
  • Make new starboard lower outer seatbelt bracket
Saturday, March 29 - 9 days to go
  • Modifying the strut fairings to the bolt on the strut attach fairing can come off.  Came up with a new plan, and partially executed today.  I bonded together the two halves where I need to extend the aft portion.  Then cut it with a coping saw.  2nd one in progress.
  • Elevator and stab removed.  Prepped, primed, deburred, fasteners and final riveting on an inspection ring on the bottom of the stab i forgot to install years ago.  
  • Made all new pin keepers... the previous owner had made them, and I couldnt find them.  Searched for an hour.  Had everything to make new ones, so I did.  Plus spares :-)
  • Figured out exactly how to get the pins and keepers in the elevator.  I had been trying to insert on the plane, which does not work.  You have to bring the elevator up to almost 90 degrees to get the pins and keepers in.  So that is solved.
  • Helped Peter weigh his amphibious ultralight.
  • Very productive day... I'm tired.


Sunday, March 30 - 8 days to go.
  • Elevator trim hinge pin finally fit in place.  As with the elevator itself, needs to go in from the bottom.  Added a few rivets that I cannot remember why I missed them.
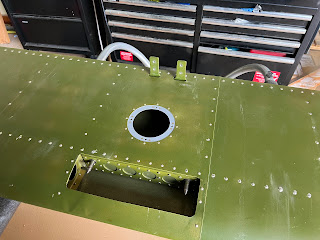
  • Potted the holes for the park brake valve.  Need to come up with a better solution for this.  It's a royal pain it its current location.
  • Disassembled elevator trim servo and bagged everything for paint.
  • Assembled all inspection panels for paint
  • Worked on starboard strut to fuselage fairing.  Not fitting well at all.  I have done something wrong here.
  • Added flange for port strut fuselage fairing so nutplates can be added later.  Needs 1 more layer of glass.
  • Packed it in early.  Was starting to get frustrated and make mistakes.

Sunday, 23 March 2025

Progress - week of March 17

The push to get ready for paint is in full swing.

March 17 - 21 days to go

  • Starboard aileron counterweight slot and vent cut
  • End of wingtip sanded and made flush with the trailing edge of the aileron.
  • Sanded the seam... to get ready for a layer of glass.


Tuesday, March 18 - 20 days to go
  • Forced night off.  Crazy work day...
Wednesday, March 19 - 19 days to go
  • Zip... flying club meeting.
Thursday, March 20 - 18 days to go
  • Wingtip / aileron closeout started on both wingtips.  Foam cut, fit and bonded in.
  • Starboard fuselage to strut fairing roughed in and meeting up.


These suckers are a lot of work.  Put in on, mark it, take it off, trim, rinse and repeat.

Friday, March 21 - 17 days to go
  • More strut fairing.  Bolts are back in, holes cut.
  • Had lots of visitors... did not get much done.
Saturday, March 22 - 16 days to go
  • Thanks to Jim and Bruce, all the fuselage bolts are in and tight!  VERY GRATEFUL FOR THE HELP.
  • They also got all the fasteners in the hatch covers, and Jim started the starboard wing tip fasteners.
  • Weighed the plane.  She has gotten fat.  Need to check the numbers.
  • One layer of glass on the port wingtip closeout.  All temp holes have a fiberglass backing.  Added glass inside the port wingtip nose to fix the curvature problem.
Sunday, March 23 - 15 days to go
  • Thanks again to Jim for helping!
  • All nutplates installed for wingtips
  • Next round of filler on wingtips
  • Aircraft weighted again, but not in level attitude.  Weighed about 40 lbs less.
  • Covers for flap track pockets cut, fit and drilled.
  • Hatch covers installed.  Lower hatch cover holes drilled on port side.
  • Finished trimming port side strut fairing around tab for wing fold brace.  Reinstalled.


Monday, 17 March 2025

Aileron Counterweight Slot in Wingtip

When I cut the first slot in the wingtip for the aileron counterweight, I measured the location from a taped line indicating the edge of the wingtip.  It worked.  As a side note, the scribe lines on my wingtips were WAY out.

I kept thinking there has to be a better way.  Tonight I found one.

I took a piece of poster board (dollar store... my go to for making templates).  Cut it roughly the right size, but bigger then needed.  Taped it in place, then clecoed that into the pilots I have drilled for the wingtip.

Then I drew out the counterweight.


Cut out the mark on the poster board, then clecoed that template to the wingtip.  Drew it out, then cut.


It needed a bit more trimming, as I cut it small on purpose.

I think this is better... way better than using the scribe lines, and better than measuring and hoping.

Sunday, 16 March 2025

Progress - week of March 10, 2025

Another week... 28 days to go until paint.


Monday, March 10 - 28 days to go

  • Flap track fairings... rivnuts installed
  • Outboard delta wings - drilled


Tuesday, March 11 - 27 days to go
  • Night off... other plans
Wednesday, March 12 - 26 days to go
  • Rudder base fairing.  Final trimming and fasteners installed.


Thursday, March 13 - 25 days to go
  • Fuselage inspection hole / cover (forward of tailwheel attach point)
  • Worked on the elevator and trim tab hinge pins.  They are very tight to insert.
Friday, March 14 - 24 days to go
  • Finished trimming starboard hatch cover and filler on seam
  • Bonded trailing edge of starboard wing tip
  • Ordered ELT and fire extinguisher.  Aircraft Spruce Canada wanted $400 CAD to ship.  Aircraft Spruce US was on $100 USD.  Robbery.
Saturday, March 15 - 23 days to go.  3 full weekends left.
  • Fasteners in all switch panels on the panel.  No need for any to come out except the breaker panel 
  • Starboard wing vent started.
  • Starboard aileron counterweight drilled.
  • Door seals fit
  • Antenna doublers in wing fabricated, drilled and primed.


Sunday, March 16 - 22 days to go
  • Riveted antenna doublers and mounted antennas properly
  • Found 6 missing rivets on the right aileron.  Fixed
  • Mounted aileron trim hinges pin retainer.
  • Right aileron mounted with new rod end (long story...)
  • Started pulling vinyl off the wing panels
  • Fixed pilot side door.  C clips kept popping off.  
  • Messed around with elevator trim tab.


Productive week

Monday, 10 March 2025

Fuel Tank Vents

This tasks has been on my mind for literally years.  Modifying a fuel system scares the crap out of me... 

I have a header tank... purpose of the header is to simplify the fuel system.  Fuel injection return can simply go back to the header and does not have to go all the way to the main tanks.  Can also use a simplex fuel valve, and not a duplex.  Also adds some weight up front, and 2 more gallons of fuel.

So the vents... per the manual, run the vents out the bottom of the wingtip using either aluminum tube or the plastic line.  It is well known that this vent system will leak when (1) the tanks are full, (2) parked on a slope, or (3) daytime heating when the tanks are full.

The TWTT instructions modify the vents from the original manual.  The vents are T'ed together, and you run the vent line up as high as possible under the tip.  This is better.

On the forum, many have modified the vents using a 'bleed' type check valve prior to exit.  Lets lots of air in, only lets a little bit of air out.

Lastly, the underwing / tip exit has caught many on the noggin.  The aluminum tube vent is the worst.  Some builders are now using under wing machined aluminum vents designed for RV's.  These are nice as they have a screen, 2 vent holes (1 facing forward, and a backup at the rear).


Link to JD Airparts Site Here.

So my plan is to incorporate ALL of these.  T the vents, check valve, and under wing machined vents.

My worry... the vent for the main tanks and header tank work OPPOSITE from a venting persepective.

For the main and aux tanks, the vents let air in so fuel can depart.  For the header, the vent lets air out so the header can fill.  I'm worried they will fight each other... but we will see very soon I hope.

The bleed type check valve is key.  It definitely lets some air in.

On the flip side... the pumps will create some suction and draw fuel through (I hope).

I mocked one vent assembly up last night.  Everything fits under the wingtip.

I used a 1/8" NPT male / male into the tank.  A 1/8" NPT 'T", then a 1/8" NPT to AN4 female for the check valve, and a 1/8" NPT hose barb on the other end. Going to feed the nylon line into 14" hose and clamp it to transition from the vent line to the "T".

First one (left wing) complete.


Was somewhat worried about edge clearances on the -4 fitting that holds the vent to the bottom skin.  May reinforce it... will see.

(The wings are folded currently...)

I reversed the direction of the check valve... what is shown in the picture is backwards!  That would have been disastrous...

Advanced Flight Systems - v17 software, and UL Manifold Air Temperature readout

I am excited... like really excited.

Advanced has released v17 software.  I have it loaded on a stick and ready to go (well two sticks, one for each display).

v17 provides support for Airmate charts and maps.  This is so incredibly cool.  Why do you ask?  Well I am glad you did...

The problem with Advanced is they only provided support for Jeppesen and Seattle Avionics charts.  Jeppesen is super expensive, and Seattle Avionics does not support Canada.  Seattle Avionics were threatening to support Canadian charts, but it never happened.

Airmate supports Canada.  In fact, I helped a friend install Airmate charts on his Dynon Skyview classic a couple weeks ago.

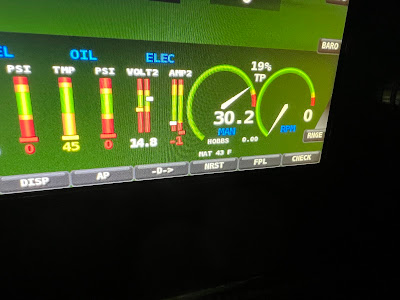
The next challenge is the UL Manifold Air Temp (MAT) gauge.  For the turbo engine, UL repurposed a canbus value for the MAT, as it is needed for the turbo engine.  This gauge will tell me how the intercooler is working, so its pretty damn important.  Ideally the inlet air temp needs to be less than 65 degrees C.

UL informed Advanced of the issue... some how it was missed, or forgotten, or omitted.  I dont know which, and at this point I really dont care.  I have been asking UL regularily when this will be available, and the answer was always soon.  But in fairness, I was not ready to use it yet.  Now I am.

v17 was their priority, and said they would get to it soon.  I receive an email today (Jan 29) that some if not all the support may already be present!  Dynon supports it on the EMS, and in their core code that Advanced uses.  So its down to display... and that may already be there as well.  They want me to test it and advise.... I'm on it!  That is the goal for today (one of the goals...).

Next piece of coolness... Advanced is going to support the AV-30 ADAHRS data as a backup to the main ADAHRS.  This means that I will have 2 ADAHRS, and that was the last piece I needed for a fully IFR capable panel.  I asked what wiring changes are needed, and the answer is... NONE!  Bada bing, bada boom.  This is down the road a bit...

Also need to check on the go around button, and the remote ident button for the Tailbeacon X.

All of this stuff is REALLY COOL.  Canadian maps, MAT support, 2x ADAHRS... that ticks a bunch of items off my list...

Updated to v17 last evening, and the MAT works!


Also remembered to additional features I am looking for from Advanced...

1. TOGA functionality.  I already have a button wired.

2. Remote IDENT for the TailbeaconX.

Sunday, 9 March 2025

Progress - week of March 3, 2025

As of Monday, March 4.... 36 days to go.  Detailed progress:

Monday, March 3 - 36 days to go

  • Fuselage holes potted for exhaust shield in bottom of fuselage
  • Flap track fuselage pockets bonded
Tuesday, March 4 - 35 days to go
  • Took the night off.  Worked on checklists a bit.
Wednesday, March 5 - 34 days to go
  • Left wing tip.  Drilled counterweight arm, cut slot for counterweight.  Cut and fit vent fitting.  Trimmed trailing edge of wing trip.  Clearanced aileron / wing tip gap.  Sanded for fiberglass.
  • Checked fuselage flap track pockets.  All good.


Thursday, March 6 - 33 days to go
  • Next step on hatch covers... sanding and fiberglassing.
  • Next step on port wing tip.  Trimming and filling.
Friday, March 7 - 32 days to go
  • Night off.  Work function.
Saturday, March 8 - 31 days to go
  • Drilled holes for fuselage exhaust shield
  • Strut fairing - got the port side started
  • Flap tracks - all drilled.  Need a different die for my rivnut tool... 8-32.  Ordered.


Sunday, March 9 - 30 days to go.
  • Fiberglass on port wing tip.
  • Strut fairing continuation
  • Cleaned the hangar so I could get to the starboard wing tip (shelf was in the way).
  • Pilots drilled on the starboard wing tip.  Aft cut for aileron.


Sunday, 2 March 2025

Mar 1/2 2025 Weekend Progress

The 5 week countdown is on.  Weekend accomplishments

  • Fuel system testing
  • Starboard side horizontal stab fairing bonded
  • Hatch covers fiberglass proceeding.  Couple more steps to go
  • Port wingtip aft seam bonded.  Pilots for all fasteners drilled.
  • Cleaned up hangar mess to get space for fiberglass work, then made a new mess.
  • Pilots door handle snap ring replaced and arm rest reassembled.
  • Tie wraps replaced on engine that were cut off to fix EGT / CHT issues.  Plenums reassembled.
36 days left…

Fuel system delivery testing and results

Spent Saturday, March 1 2025 testing the fuel system.

Bottom line:  Good new, and news.  The news is yet to be determined if good or bad.

Needs:

  • Everything is going to be in Liters.  It’s just easier.
  • Then UL520T needs 68 Liters / hours (based on 0.3 Liters / hour / HP)
  • Using a 50% safety factor.  Gravity system needs to deliver 102 liters / hours
Test setup
  • Fuel system emptied of all fuel, except anything unusable (specifically header tank).
  • 20 liters added to each main wing tank
  • Check valves installed in header tank vent, with directional arrows pointing away from the header
Header fill
  • Took just shy of 6 min to fill header tank.
Test 1
  • Drained 20 Liters into Jerry can at firewall, same level as exit.
  • Fuel selector on BOTH
  • Gravity only.  Tailwheel on the ground.
  • Time:  8.8 min, which equals 136 Liters / hours.
  • Pass (102 Liters / hour needed)
Test 2
  • Drained 20 Liters into Jerry can at firewall, same as test 1
  • 20 Liters added to left tank
  • Fuel selector on LEFT.
  • Gravity only, Tailwheel on the ground
  • Time:  11.2 min.  107 liters per hour.
  • Pass
Test 3
  • Completely drain useable fuel from header
  • Add fuel to both tanks.
  • Test fuel consumption with header low
  • Upon setting up for this test, with fuel selector OFF, header tank would not drain.  This is due to the check valves blocking the vent path.
  • Test fail.  
  • Not sure if this is a bad thing or not.
Test 4
  • Repeat of test 1
  • 8.7 min, 138 liters / hours
  • Pass
Test 5
  • Fuel selector on both
  • Fuel pumps connected to firewall bulkhead connector
  • Fuel line from engine disconnected.  Fuel pumped from gascolator into Jerry can.
  • 20 liters pumped
  • 4.92 minutes, 244 liters / hour
  • Pass
  • This is an unreasonable test.  The header low warning lights came on… the first one at 2/3rds came on after 1.76 min.  The 2nd one came on after 3.73 min.  There is no scenario where this would be needed… I wanted to see where the header tank could not keep up with the demand, and I found it.
  • It took 6.6 min for the header to fill back up after the pump was shut off.
So what did I learn from all this:
  • The check valves on the header tank solve the problem of fuel coming in via the vents.  This also solves the cross feed problem.
  • The header tank fills slower than I would like.
  • In no reasonable scenario tested did the header ever show a warning.
  • Even on 1 tank, there is enough fuel delivery for full power fuel consumption plus a 50% safety factor.
  • All my tests were with a maximum of 20 liters / 5 gallons in each tank.  This test needs to be performed with FULL main tanks (60 liters per side).  This should add significantly more head pressure.

More testing needed, but so far the system works.  Need to change some variables and test again.


Saturday, 1 March 2025

Header tank venting...

Well, I have backed myself into a corner.

Further to the last post about the header tank vent(s)... current design (T'ed into the vent for the pillar header and to each main tank) is not going to work.  This will lead to cross feed and an ineffective fuel valve.

What are the 'truths'.  Things that I know are facts:

  1. The header needs to be vented to allow air out so there is room for fuel to enter
  2. The vent point should be higher than the highest fuel level
  3. The current configuration will allow bypassing of the fuel valve, and cross feed on the tanks
Options:
  1. Check valves on the header vent between the pillar header and the main header.  This will stop fuel from the main tank / pillar header from each side entering the header.  It will allow air to escape IF the air pressure is greater than the head pressure from the fuel.
  2. Mast vent on the center line with the exit above the wing level.  This presents an opportunity for fuel siphoning out the vent.  No bueno.
  3. Using Paul's method run a new vent line out to one wing tip.  This is problematic, but doable.  In theory this solves all problems.
Option 1 is easy and cheap to try.
Option 2 scares me
Option 3 is more work but most likely the best solution.

4th option:  Modification on option 3... run a vent line out and T into the outboard vent on the main tank.  This is more doable, but assumes I have access through the forward spar to fish the new vent line through and T it in.  Need to look at old pictures to see if this is possible.

Yesterday (February 22) I installed a check valve on the starboard header vent.  Aircraft spruce check valve that has no spring, gravity only.  Arrow points towards the main tank to let the air out.  I was going to install the port side, and realized I only ordered enough fittings for one side (ordered 2, needed 4).  So those are now ordered.

Prior to installing, I wanted to get the fuel out of the vent lines.  After grounding the aircraft and draining all the fuel from the belly low points and header, closed the main fuel selector to OFF, and pushed compressed air into the header from the firewall fuel line fitting.  That did the trick... when cutting the vent line, there was no fuel.  WIN!

Now waiting for the other fittings to arrive to do the starboard side.

I am very concerned about fuel delivery.  This needs to work and work well.  No compromises here.

2nd check valve installed (Feb 28).  Fuel ready to go in the tanks... first will be a leak check, and then a fuel delivery check.  See how much I can actually deliver.

I am getting more stoked / positive on option 1.  In theory, when the pumps are drawing fuel from the header, it will create suction... which will pull the check valves closed... and actually draw fuel faster.  At least that is my theory.  Will see if it holds true.  Stay tuned...