Airplanes have a lot of places you shouldn't push / pull on. On high wing aircraft, you have the struts which works great with 2 people. For trikes, you can use a handle on the nose wheel. The prop works, but has risk associated with it.
Some tail draggers have retractable handles on the rear fuselage.... a Tail Pull Handle...
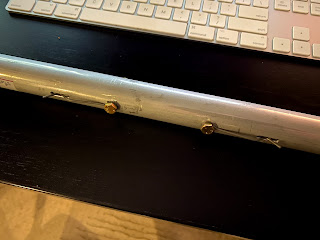
B.A.S. makes one for the Sportsman. They are a pretty simple concept. Essentially it is a tube that mounts on the airframe, with small retractable handles (another tube) that you can use to push / pull the airplane around.
Ted Setzer wrote this up for the forum, and as usual I am following his trail.
There is a .09 stainless wire that stops the tube from popping out. On the inboard side, there is a bolt that goes through the outer tube and the wire is wrapped around it. On the handle side, the wire is welded to a washer.
Step #1 was disassembly... I ended up unbending the wire around the bolt, with the hope of wrapping it back around after the handles have been anodized.
Step #2 is drilling the mounting holes in the fuselage. You crawl in the fuselage with a hole saw and drill the first hole up against the forward side of bulkhead B. Then I got out and put the tube into the first hole... using a small level I marked the top of the other side and drilled it next.
I started the holes on the inside, through the inner layer of glass. Then I finished the hole from the outside. The act of drilling the inner gummed up the hole saw enough that I had to get out anyway to remove the debris.
I used a 1 1/8th hole saw. The outer tube is slightly bigger than 1 1/8. I tested on a thin piece of wood first, and it was right on the money.
Step #3: Getting the handles anodized. I unwound the wire and extracted the retaining mechanism and sent the handles off. They are nice and black.
Step #4: Reassembly. I put the whole thing back together and then filled the cavities in the fuselage with a mixture of resin, cabosil, and milled fibre. Then inserted the handle from the inside, and filled the gaps between bulkhead B and the handle.
Step 6: Trim the excess handle on the outside of the fuselage. I put aluminum tape around the hole to start with to act as a buffer between the sanding disk and fuselage. Once I got to that level, I removed it and trimmed the last little bit very carefully. I did all this with the handle installed, so I taped up the handle and put a towel inside. I sucked out all the shavings with a shop vac before removing.


No comments:
Post a Comment