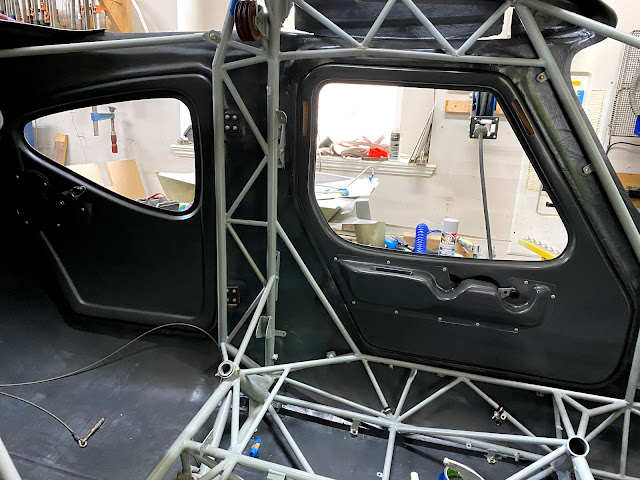
In 2020 Glasair came out with a new 'Interior' for the sportsman. New cage color, new seat color, and new interior color.
I plan to leave the cage 'as is' (aka light grey), but 'darken' the interior fibreglass to match the new style. I really don't think I can get good coverage on the cage with it installed, so am going to leave well enough alone.
Glasair uses a Sherwin Williams product - 'JetFlex', which is a proper aviation interior paint. This stuff is expensive - like almost $500 CDN / gallon (plus catalyst and thinner - $700 all in). And then they top it with Zolatone. My interior already has Zolatone (aka texture), so I started playing around with putting the JetFlex on top, to see how it comes out.
Bulkhead A with factory (quick build) Zolatone.
I cleaned it, and then rolled the JetFlex on using a smooth foam roller. I contemplated spraying it (which is recommended), but since JetFlex is self levelling I figured I would try rolling it. I am quite happy with the results.
It shows the inconsistencies in the fibreglass... but will you see it? I dunno. This was a test piece, as I am probably going to upholster the bulkhead anyway.
Need to noodle on this a bit more, but I can see a plan coming together.
Bottom line is I want the entire interior repainted before moving on to installing systems (or reinstalling), because I have removed almost everything to get to this point.
Test #2:
I took the rear (pilot side) door.... sanded and cleaned it thoroughly, and rolled / brushed the JetFlex on.
Rear door prepped and cleaned:
After painting (aka rolling):
This is still wet. Next picture is after drying overnight:
All I can say is 'WOW'. Total transformation.
The reviews I read on JetFlex are pretty good. Really good wearability, easy to put on, etc. So far I agree with all of these statements.
The trick seems to be prep (isn't it always?). I spent an hour sanding and cleaning, and probably 25 minutes mixing / painting / cleanup. I am REALLY happy with the results.
There are a few bits off 'yuck' in the finish, but they are minor. Overall it is pretty damn good.
The MDMS says it will dry to touch in 15 min at 25C. In March with the outside temperature at 5C, and the heaters screaming I could barely make 20C. I rolled it once, re-wetted the roller, and went over everything 2 more times. Closed the doors with the heat on and walked away till the morning.
But, this stuff stinks really bad for about 24 hours, and then it all goes away. The Zolatone seems to make a pretty good base / primer to apply the JetFlex on top of.
Next I am going to do the two front doors, and then move on to the rear / baggage area. Will sand and fill as required, mask off all the hard points, and roll away. Then will move on to the forward area... which will be a lot more challenging. Hope to have all this done in the next 1.5 weeks, then I can start putting everything back in and get to the fun stuff.
Not finished yet, but its a lot of the way there...
First front door complete (co-pilot). I will replace the screws one day with dark / black screws... but for today, this is good enough. This pic gives a good comparison of the before and after...
I did the repaint in sections. Doors were done individually, but for the fixed interior I did the rear first as it required the most sanding / filling. Then I did the roof and door pillars, down to the top of the seat rails, then the floor and forward of the doors.
Last section.... below the door sills, forward cabin floor, and up to the firewall.
Need to do any spot touch ups on the fuselage, pilot door, and redo bulkhead A.
Honestly I don't know if I would do this again. It has taken weeks to remove everything, sand, fill, prep and paint. The results are pretty good, but not stellar. But, it is a lot better than what it was, so I guess I am satisfied. It was a lot of time and expense for 'meh'. Maybe I am being to critical. BUT, its (almost) done, and then I can get onto reinstalling everything and moving onto the next step(s).
Last pic.... pilot side doors all done and temporarily installed...
Now everything else had to be re-installed... but I am pretty happy with the results overall.
The back has gotten a bit dusty with all the moving around of dusty 'stuff'.


No comments:
Post a Comment