With the mold made, next step was to extend the top cowl. My plan (such as it was / is):
- Wax the inside of the aluminum
- Scarf the cowl
- Place a layer of peel ply against the aluminum (to get a nice finish of the end result)
- Build a jig to hold it all together upside down to allow for rolling pressure, etc.
- 4 layers of glass / resin, with another piece of peel ply on top (which is really the bottom)
- The gap to be filled is 11". The first layer is 12", 2nd 12.5", 3rd 13", and final is 13.5. That should give a good bond (I hope)
I cut the glass and peel ply on our pool table (because no one really uses, it, right?)
Here is the contraption all assembled and ready to go.
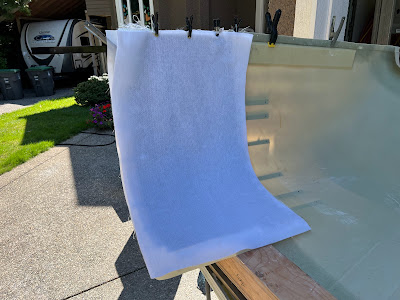
The error that I seem to have made was hoping that the peel ply on the aluminum would stay put. It did not, and I got puckering in the corners. No matter what I did, I could not get the glass to sit on the aluminum. Further, I had significant resin bubbles that I could not get rid of. I kept laying the glass down hoping it would work its way out, and it just kept getting worse. Watching the clock, I finally got desparate after the final layer of peel ply and very quickly cut a big piece of bleeder material, layed it on top, and rolled the heck out of it. Thankfully that resolved about 90% of the bubbles and left a reasonable finish.
(above pic is with the bleeder removed)
Next step will be to disassemble, remove the peel ply, and see what I have.
Turned out OK. Going to be lots of finishing work to make it look seemless, but the profile is what I was hoping for.
Need to do a rough cut on the overhang, and start the mold for the bottoms. I am going to do these one side at a time, and then figure out what to do about the air exit bulge.
Starting on the lower cowl sides and bottom - left side first. I switched to .025 aluminum fro .032. Much easier to bend, and the bottom radius is much tighter.
Same process. Jig it up with the same aluminum angle braces and get it to sit right, then insert the aluminum and cleco it in.
Next is chamfering the edges and jigging it up to lay the glass. The profile on the firewall side is good, but there are some gaps on the forward side the will need filling later. I think this is unavoidable.
The upper and lower edges are not cut to the final profile yet. Just trying to get the shape right.
Mold ready for glass
Layup complete
Upper and lower cowl on the airplane. They line up OK. Going to need some finessing on the transitions, but that is just filling and sanding. Overall, mission achieved.
Right side jigging and layup
After removing the form and putting it back on the fuselage.
Next will be to reinforce the outside (where there is no overlap) to stiffen everything up. Then will be the air exit ramp.
Started with the top. Ended up using a 2" drum sander barrel by hand, with a separate sanding block to get rid of the gel coat (or whatever the surface is that came on the cowl).
2 layers of glass. 1" strip, followed by a 2" strip. A lot of this will be sanded off once cured.
Overall I am happy with the progress and outcome, but this is going to take another month or so to make it look right. I think I have a solid foundation, but there is going to be a lot of filling and sanding.
That is enough for this post... Part III to come.


No comments:
Post a Comment