Search This Blog

Tuesday, 9 June 2020

Aileron and Flaps.... Part I

So the wings are progressing well.... bottom of the left wing is 99% riveted (just a couple bent ones to fix), and the right wing is probably between 40 and 50%.  A few hours and the right wing will be done.

But, I needed a break... so I decided to 'just whip the ailerons together'.  Boy, was I wrong.  


Looks easy, right?  That was less than an hour....


Hinge brackets forward of the main spar...


Drilling the skin bottoms.... this part goes pretty fast, especially when you have both setup at the same time.


Inspection hole covers on the bottom... these allow access for the bolts to go through the hinge bracket. 


Flipped over.... drill the tops.  I use steel weights to hold everything in place.


So this was fun.... cutting the aileron skin for the trim tab.  I debated on how to do this for awhile, and finally settled on a jig saw with a throw away piece of wood underneath for the long cut, and a Zip disk on a Dremmel for the short cut across the joggle.  I stressed about this way longer than it took to actually do.  Then cleaned it up with a file.


Similar plan for the inspection hole for the servo.  Used a jig saw, with a 1/4" piece of ply underneath for support.


Anti-servo tab cleecoed in place.


Inspection ring for servo in place.


Electric trim servo tab cut and being fit.


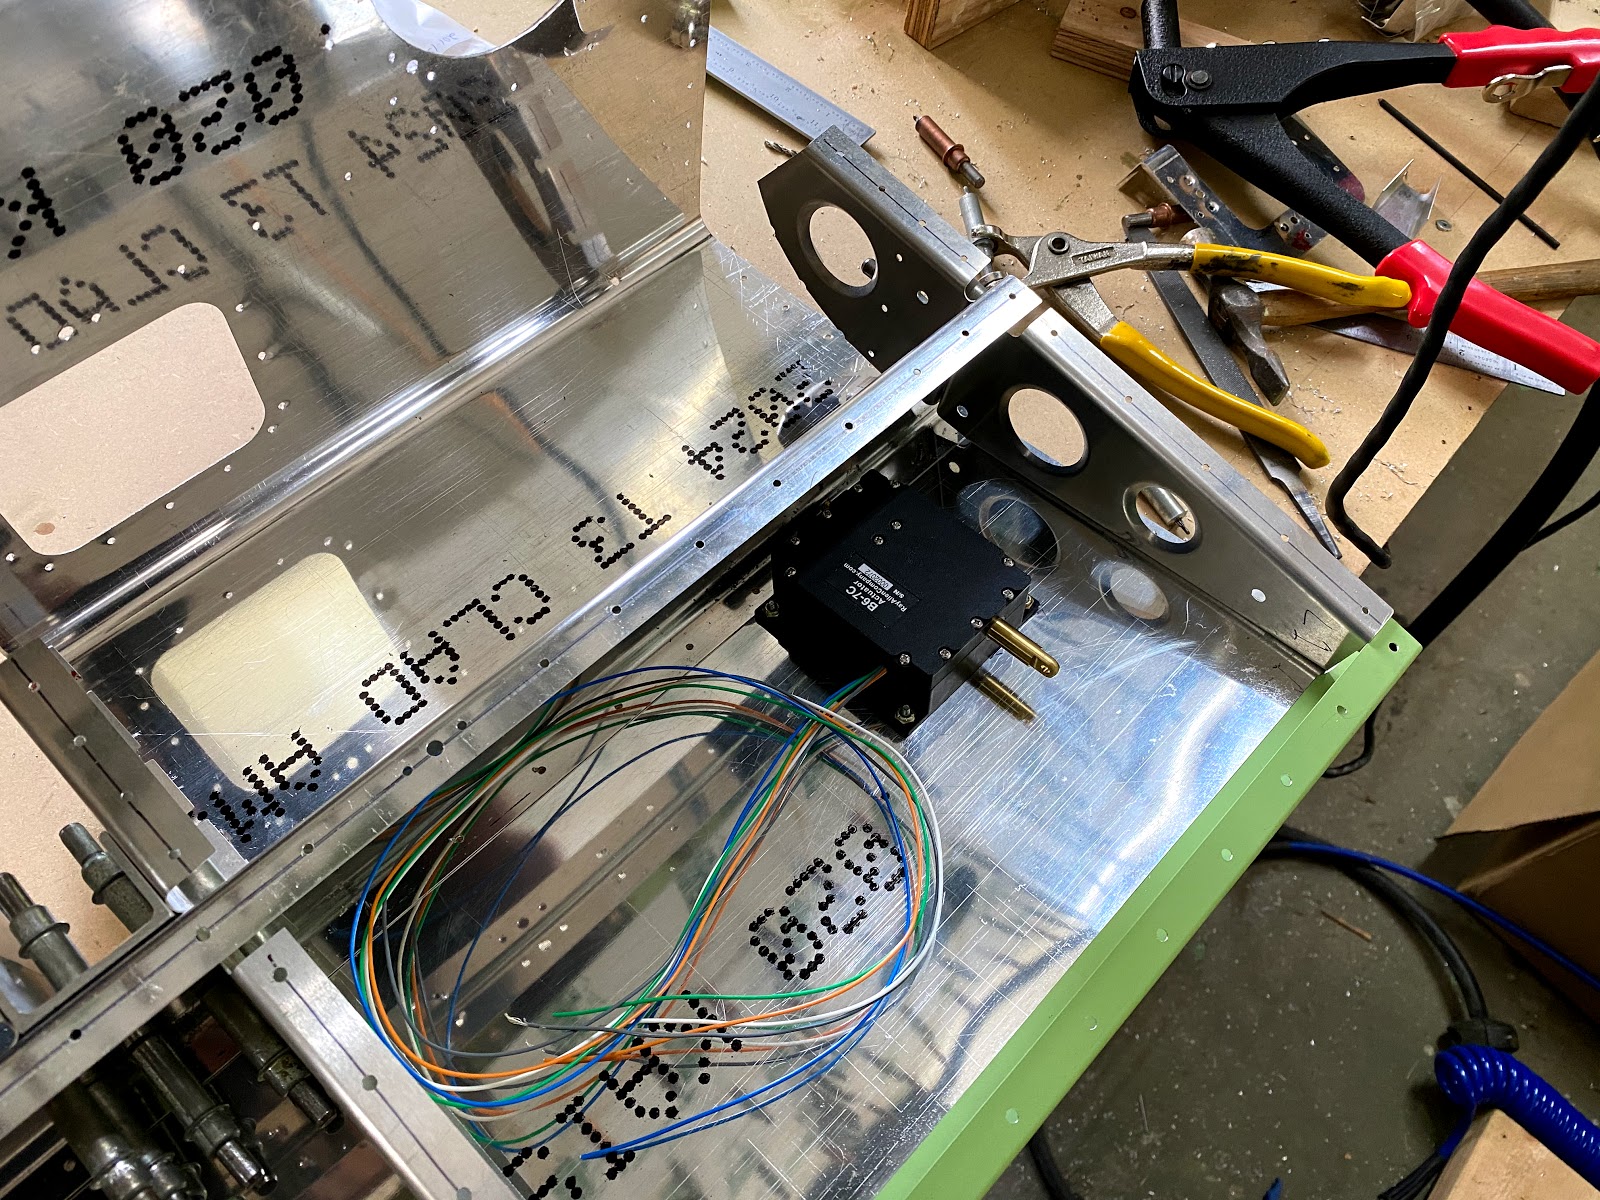
Servo temporarily installed.


After alodyining and priming, reassembly begins!


I built a simple jig that sits on top of a portable table to clamp the spar to, but allow ready access for riveting.  Block on the trailing edge that clamps to the wood top as well for stability.


At this point (bottom skins of both ailerons riveted), then get put away awaiting inspection.

So, onto the flaps.  My goal is to get both the ailerons and flaps inspected at the same time.

Below is all the hinge brackets.  3 pairs per flap.


Saturday, 28 March 2020

Wings - Part VI

Coronaviris... good for building!

We were planning on Spring Break in California.  Well that didnt work out...  So kept the 2 weeks of vacation and got a lot of stuff done around the house and on the wings.

The flap track attach angles took me months.  They are a royal PITA.


Cut them to length on the table saw.  Marked out the cuts and make them (with a wide margin) on the bandsaw.  Then use a spindle sander to get the inside radius on the angles.  Then it was a file, sand paper and steel wool to get them finished.


Getting them located was interesting and a bit challenging... But got them done.


Now onto riveting the lower skins.


Jigged up lefthand wing.  And then it begins...


Still a couple more hours to get the last of the rivets into the left hand lower skin... Then its onto the lower right skins...


Tuesday, 31 December 2019

Wings - Part V

Things are definitely moving along now.

Flap bellcranks are assembled, and in their mounts.  Next step is to build the flap cable pulley that goes behind the aft spar.  At this point, clearances need to be checked to verify the cables will go through the holes on the spars.  I used nylon line for my weed trimmer.


I can't say enough about having both wings going at the same time... It is more than twice as fast from a build perspective.  The first one (in my case) usually involves some learning, or jigging, or swearing... while the 2nd one goes much faster.


Attach angles for the flap brackets.  These are very fiddly to make.  


Finally... reassembly time!  Ribs starting to go back in...


Main ribs 1 and 2 need to be riveted together... I used the C frame for these... makes a nice job and is very quick.


All ribs installed and riveted.  The cap strips under the forward spar are clecoed in place for when the nose skins go on.


Speaking of nose skins...  I made some jigs to hold the skins while riveting.  I clamp these to the bench.  Worked very well - keeps the entire assembly held firmly.  I can also use the cut outs to clamp the piece into place very firmly, but haven't seemed to need this.

Had some issues with the flush riveting... I have done a bit of this in the past, but never this much, and never on a curved surface.  The squeezed rivets (aft most rivet hole top and bottom, and the end ribs can be squeezed - more if you have a longer yoke) were good, but the bucked rivets were slightly proud.  So after tiring of drilling out rivets, I asked from fellow builders for some advice.  

Seems like I was putting too much pressure on the bucking bar, and not enough on the manufacturer head.  This seemed to address the issue.  I am using a small tungsten bar on the interior of the assembly.


I moved the assembly from side to side in the alley between the wings.  Luckily I could do this on my own.  Simply remove all the jigs except one on each end, and move one end at a time.  When the assembly is all 3 nose skins (16' long), it is rather wobbly.


First nose skin in place.... but I missed one rivet... so it will have to come back down once the other side is done.


2nd nose skin in process.  The first one took me 3 partial days.... the 2nd one was 80% completed in about 2 hours.  Probably 3 hours total.  Building both wings at the same time is the way to do it, no doubt.

Once these two nose assemblies are done, they will need to be inspected before I can move forward.  Submitted the paperwork on 12/31/2019.  Happy New Years eve!

Next steps:

  1. Finish nose skin / rib assemblies
  2. Rivet nose skin / rib assemblies to forward spar
  3. Alodyne / prime main skins
  4. Fabricate lower flap track angles
  5. Cut slots in lower main skins for flap tracks
  6. Rivets lower main skins


Wednesday, 11 December 2019

Wings - Part IV


Lots of progress since the last update.  With racing season over (at least the racing component), finally have some time to get going on the wings.

 Aileron hinges all fit, primed, and riveted...
  

Aileron bellcranks drilled and primed... part I.  After the attach angles are riveted to the bracket, they are then fit on the spar and drilled in place.  Then finally the small attach angles are drilled in place and riveted.


Assembled bellcranks ready to be fit to the spars.


Small attach angles (4 per side) all cut and pilot holes drilled.


I drilled all of these little angles in place to ensure a good fit.  Used a right angle drill and extended bits depending on the challenge.


Aileron hinges and bellcranks all riveted in place.  I thought the hinges would be afternoon job... NOT.


Aileron pulley bracket.  I clamped everything in place and drilled in place.


All the hinges, bellcranks, and pulleys for the ailerons fit, drilled, primed, riveted, etc.


Onto the flap tracks!  Yay!  I copied Ted Setzer who recommends rounding the edges and having the tracks anodized.  This avoids chipping if painted.


Fitting the flap tracks.  I cut a piece of wood the same thickness as the track and wedges it between the brackets to get the right spacing.


Flap bellcranks... initial fit.  So the manual clearly states that the pilot holes here are drilled wrong.  Why have they been drilled wrong all these years is beyond me (apparently its backwards compatibility with the Glastar).  You have to reclock the arms... but how do you keep everything centered?

My solution was to get some washers from the Home Depot Aircraft Store... I trimmed them down slightly to fit inside the arms and spacers (just shy of 1.5" diameter), and inside the crank where the bearings go (just under 1" diameter).  I then wedges the hole washer assembly together and reclocked appropriately.  


Everything alodined... ready for primer.


Assembly...


All riveted together... looks like a mini Millennium Falcon!


Flap tracks back from the anodizer...


Flap pulley brackets... initial drilling and shaping.


Next steps:

1. Finish flap pulley brackets
2. Mount flap tracks
3. Mount Flap bellcranks and verify cable clearances
4. Remount and rivet all the main and cove ribs
5. Rivet the leading edge ribs to the skins
6. Inspection!


Tuesday, 8 October 2019

Wings - Part III

The wings are moving along.

All of the components have been deburred, dimpled, and primed... the grand disassembly event.  There are ~1700 counter sinks in the spars.  More than that of dimples.  Must be over 5000 holes to debur.  Took WEEKS (or at least if felt like it did) to get everything done.  An then there is all of the cleaning, Alodyning, priming, etc.


Aileron Hinges

There are a LOT of pieces and holes to be drilled in these suckers...


7 pieces per hinge...


The manual says to build all the hinges, flap tracks, bell cranks, etc and then corrosion proof everything at once.  I can see parts getting misplaced, so I am doing everything in batches.  Clean, Alodyne, Prime, move on to the next.


Next is riveting the aileron hinges, and the bell cranks (not pictured here).  I am going to anodize the flap tracks, and clean up the edges similar to what Ted Setzer has done on his 'SuperStars'.  Pictures to come in the near future.